How to create a Maven web project using archetype selection
In my earlier article, we learned how to create a Java web project in Eclipse and how to add Maven support to it. In this article, we will learn how to create a Maven web project using archetype selection.
Create Maven Web Project In Eclipse
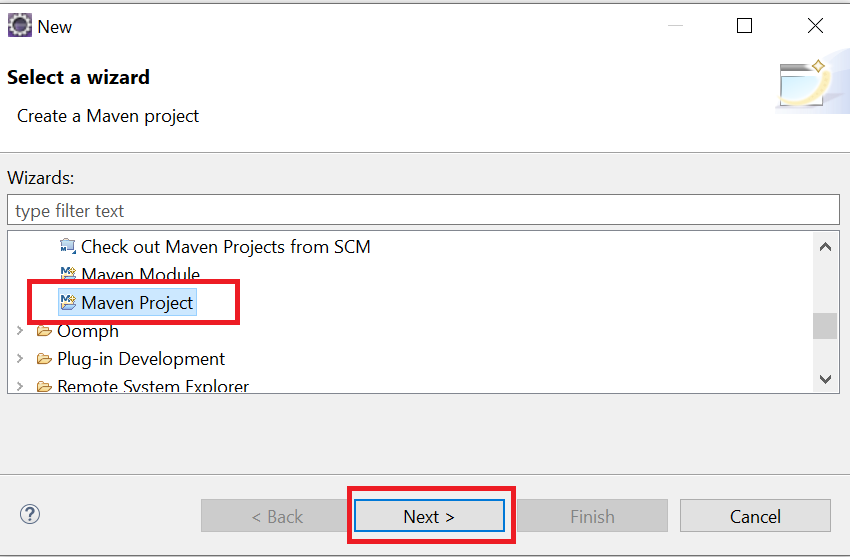
Step 1 – In Eclipse, Click on File > New > Other. Click on Maven Project. Click Next:
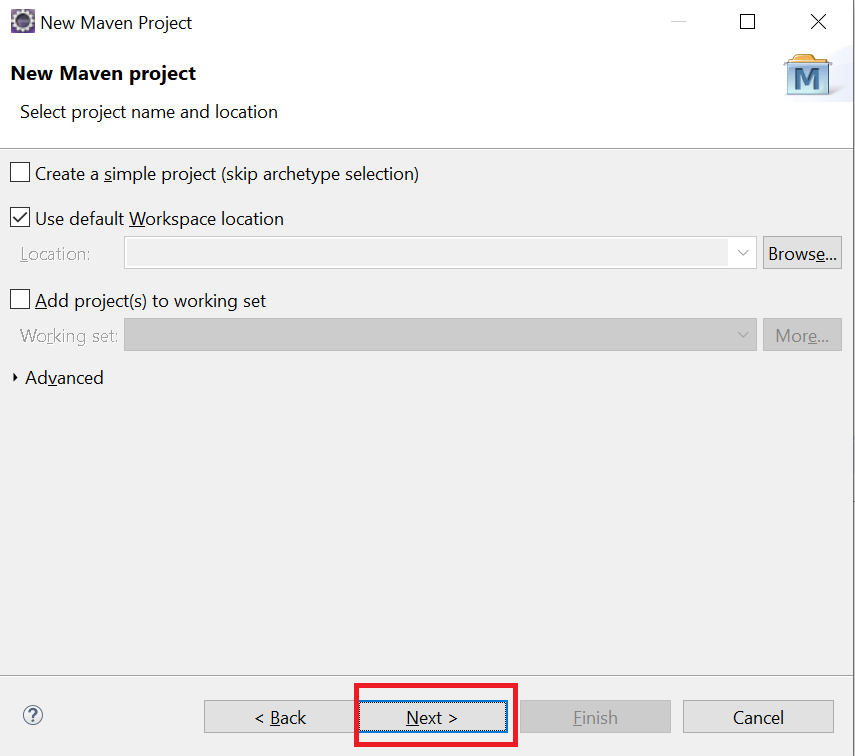
Step 2 – The following screen is displayed. Click Next:
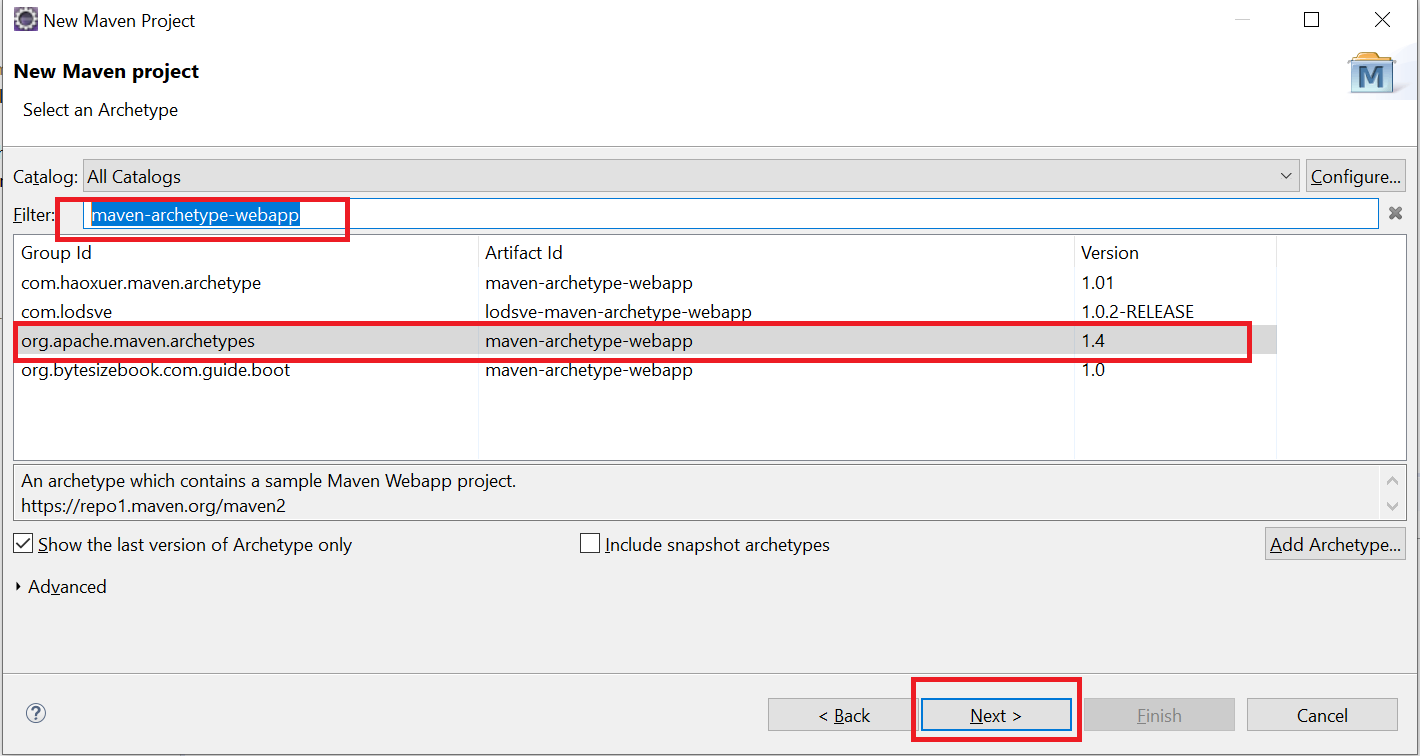
Step 3 – In the Filter text box, type “maven-archetype-webapp“. Select “org.apache.maven.archetypes“. Click Next:
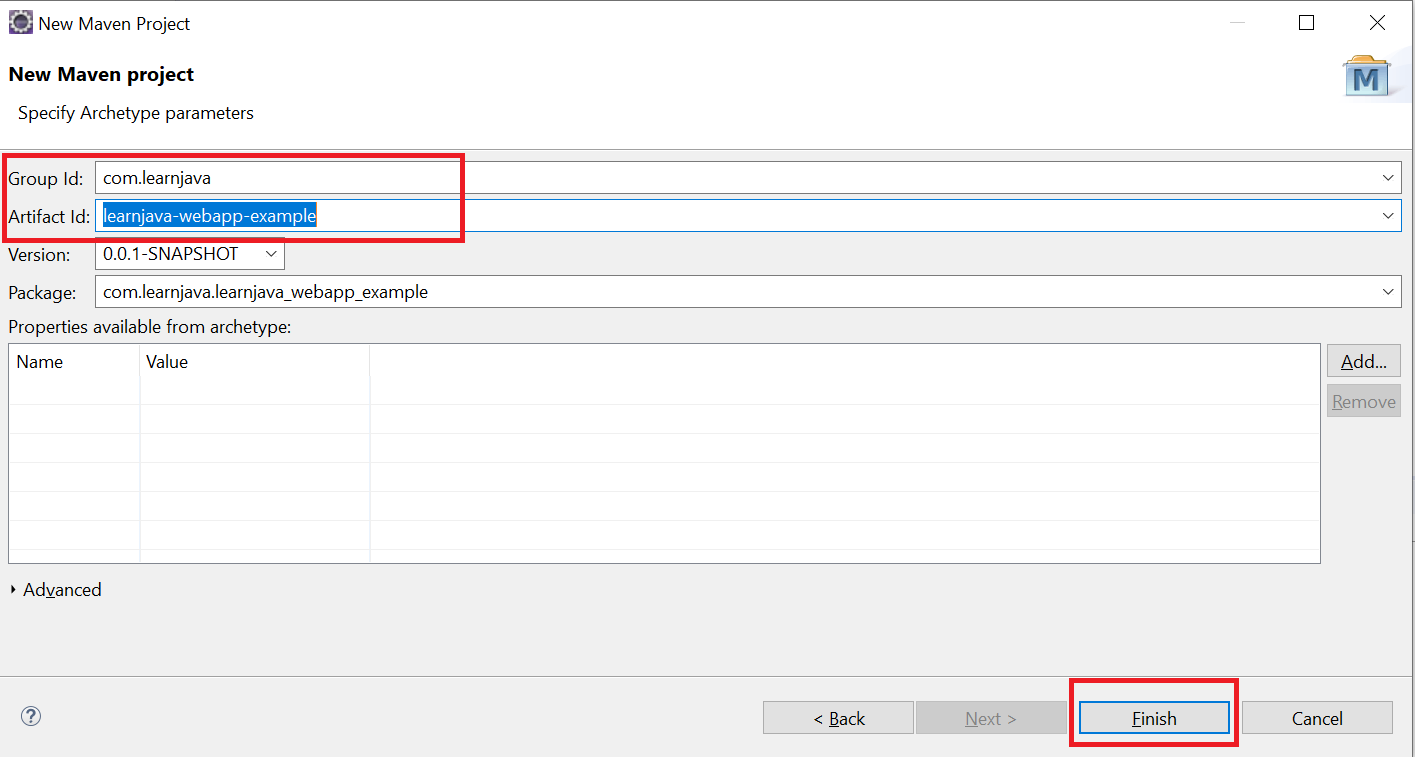
Step 4 – Enter Group Id and Artifact Id. Click Finish:
This creates a web project with the required directory structure:

Now you can add the necessary dependencies to your pom file as explained in this post. So for example, if you are creating a Spring application, you can add Spring dependencies. You can also use this as a template to create any web application with Maven support.
Further Learning
Conclusion
So, in this article, we understood how to create a Maven web project in Eclipse using archetype selection.