How to create HelloWorld Spring MVC Web application using Maven and Eclipse
In this blog post, I will be explaining how you can create a Spring MVC web application. In order to learn the Spring framework from scratch, you can enroll in this Spring Course.
Table Of Contents
Create a Project and And Maven Support
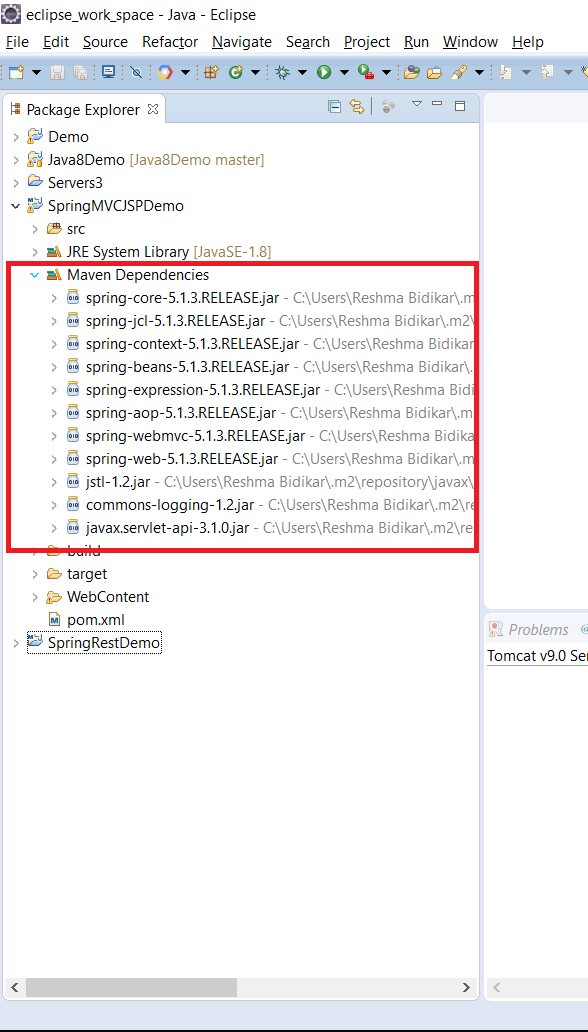
Step 1 – Follow the steps in this article to create a web project in Eclipse with Maven Support. You should see a project as follows:
Step 2 – Add the Maven Dependencies for Spring to the pom file as follows:
<dependencies>
  <dependency>
    <groupId>org.springframework</groupId>
    <artifactId>spring-core</artifactId>
    <version>5.1.3.RELEASE</version>
  </dependency>
  <dependency>
    <groupId>org.springframework</groupId>
    <artifactId>spring-context</artifactId>
    <version>5.1.3.RELEASE</version>
  </dependency>
  <dependency>
    <groupId>org.springframework</groupId>
    <artifactId>spring-aop</artifactId>
    <version>5.1.3.RELEASE</version>
  </dependency>
  <dependency>
    <groupId>org.springframework</groupId>
    <artifactId>spring-webmvc</artifactId>
    <version>5.1.3.RELEASE</version>
  </dependency>
  <dependency>
    <groupId>org.springframework</groupId>
    <artifactId>spring-web</artifactId>
    <version>5.1.3.RELEASE</version>
  </dependency>
  <dependency>
    <groupId>javax.servlet</groupId>
    <artifactId>jstl</artifactId>
    <version>1.2</version>
  </dependency>

  <dependency>
    <groupId>commons-logging</groupId>
    <artifactId>commons-logging</artifactId>
    <version>1.2</version>
  </dependency>
  <dependency>
    <groupId>javax.servlet</groupId>
    <artifactId>javax.servlet-api</artifactId>
    <version>3.1.0</version>
    <scope>provided</scope>
  </dependency>

</dependencies>
Add Spring Configuration
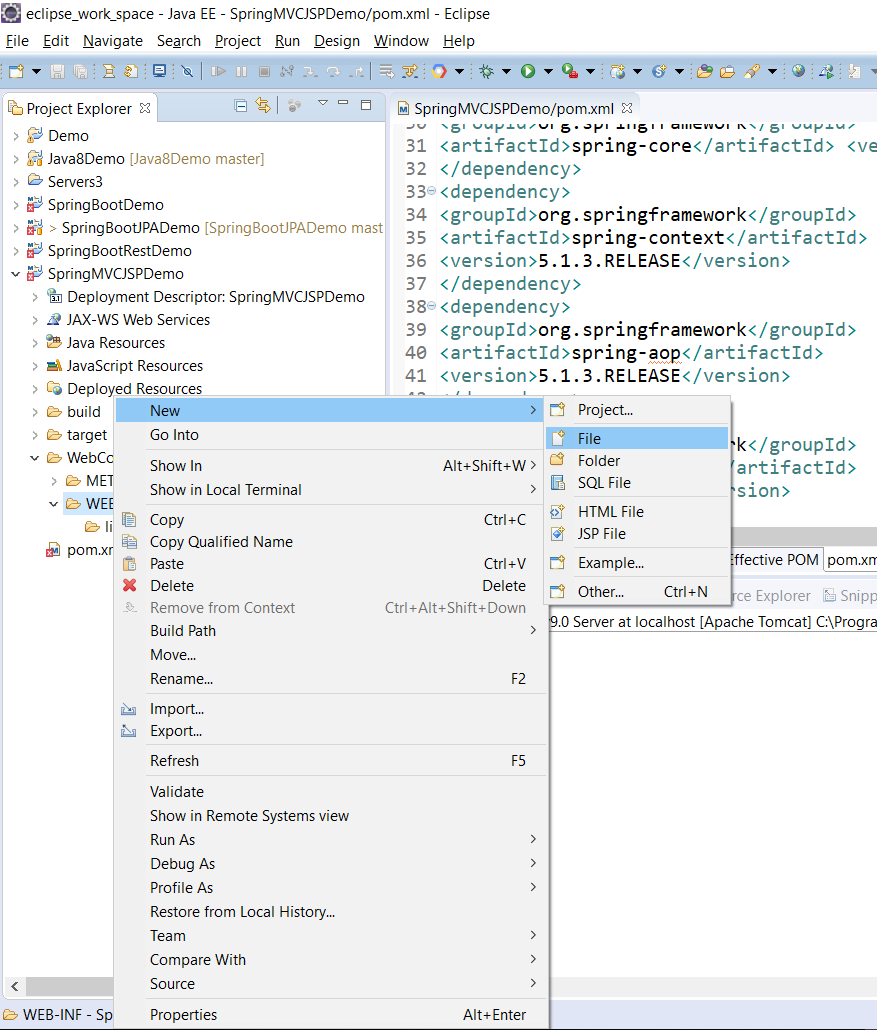
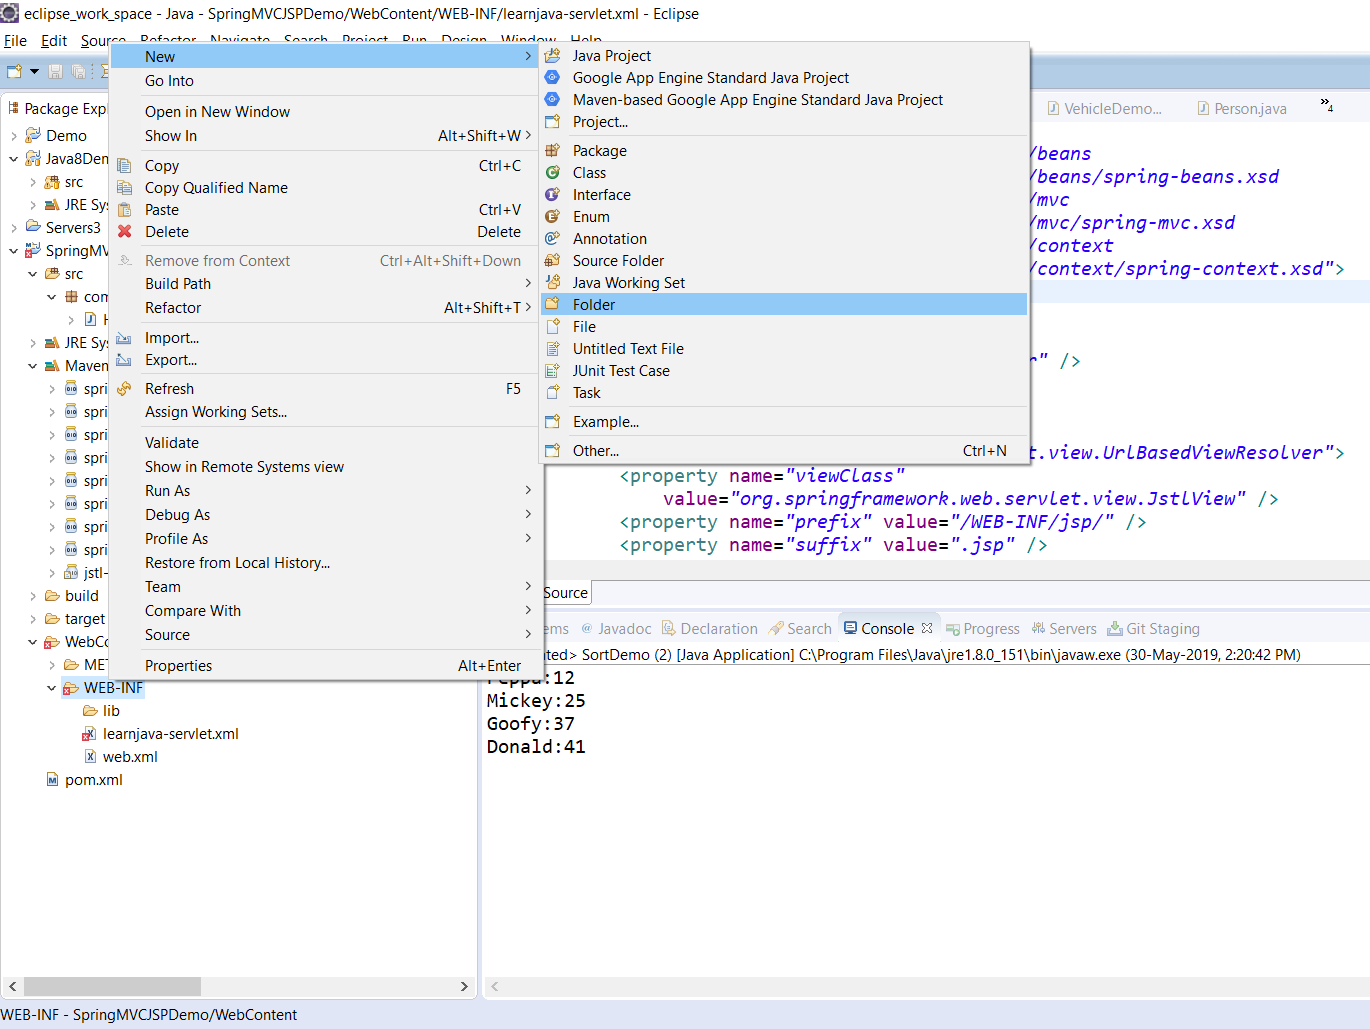
Step 1 – Right-click on WebContent/WEB-INF –>New –> File
Step 2 – Type some name. The name should be of the format <name>-servlet.xml. Here, I have used learnjava-servlet.xml
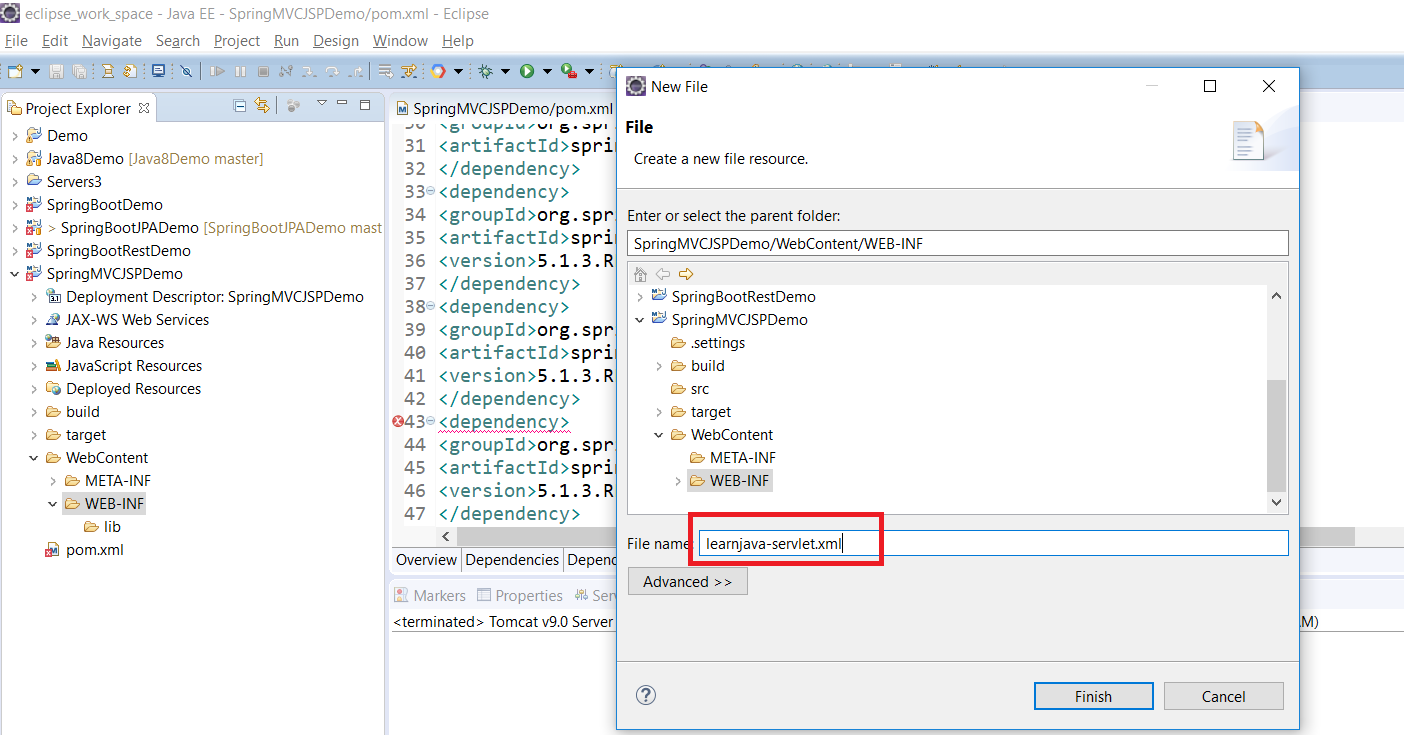
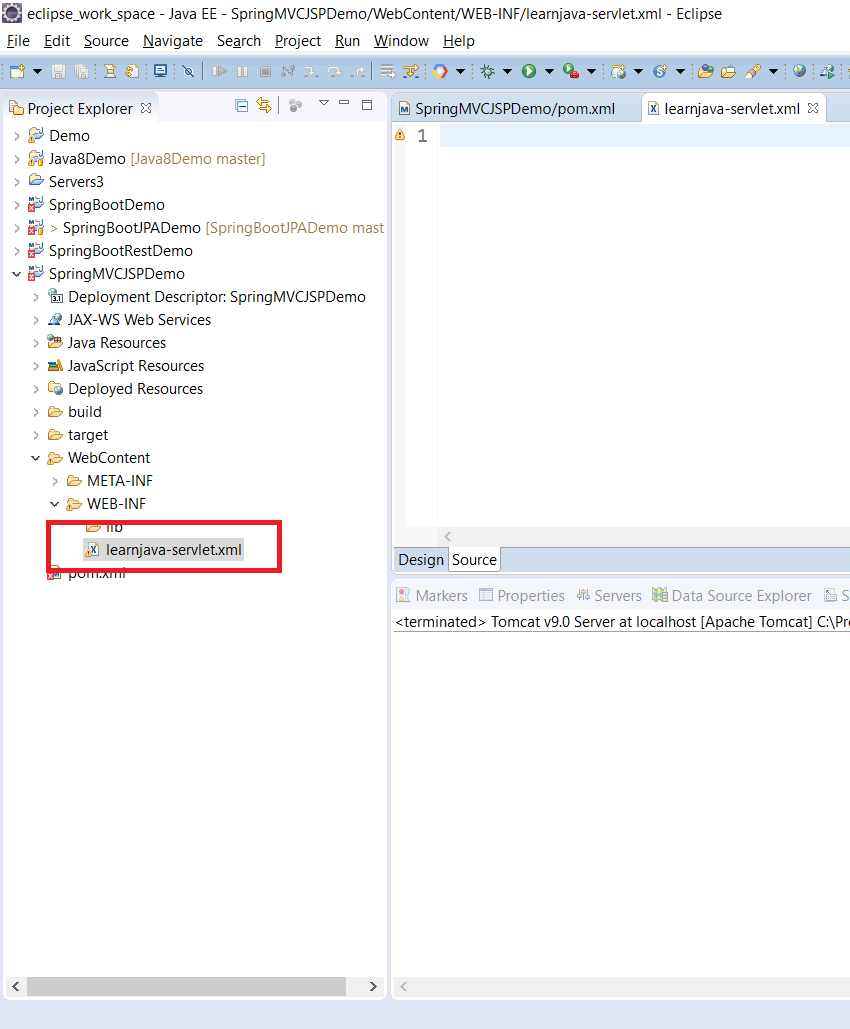
Step 3 – Click “Finish”. This will create a file as follows:
Step 4 – Enter the following text and save:
<?xml version="1.0" encoding="UTF-8"?>
<beans xmlns="http://www.springframework.org/schema/beans"
  xmlns:mvc="http://www.springframework.org/schema/mvc"
  xmlns:context="http://www.springframework.org/schema/context"
  xmlns:xsi="http://www.w3.org/2001/XMLSchema-instance"
  xsi:schemaLocation="
        http://www.springframework.org/schema/beans
        http://www.springframework.org/schema/beans/spring-beans.xsd
        http://www.springframework.org/schema/mvc
        http://www.springframework.org/schema/mvc/spring-mvc.xsd
        http://www.springframework.org/schema/context
        http://www.springframework.org/schema/context/spring-context.xsd">

    <context:component-scan
    base-package="com.learnjava.controller" />
        <mvc:annotation-driven />
  <mvc:default-servlet-handler />

  <bean id="viewResolver"
    class="org.springframework.web.servlet.view.UrlBasedViewResolver">
    <property name="viewClass"
      value="org.springframework.web.servlet.view.JstlView" />
    <property name="prefix" value="/WEB-INF/jsp/" />
    <property name="suffix" value=".jsp" />
  </bean>

</beans>
Modify web.xml
Step 1 – Create web.xml (if it does not exist). Refer to this article
Step 2 – Update web.xml to include the Spring MVC Configuration. So add the following:
<servlet>
      <servlet-name>learnjava</servlet-name>
      <servlet-class>
          org.springframework.web.servlet.DispatcherServlet
      </servlet-class>
      <load-on-startup>1</load-on-startup>
  </servlet>
  <servlet-mapping>
      <servlet-name>learnjava</servlet-name>
      <url-pattern>/</url-pattern>
  </servlet-mapping>
Add Code
Step 1 – Create a new controller class in src folder as follows:
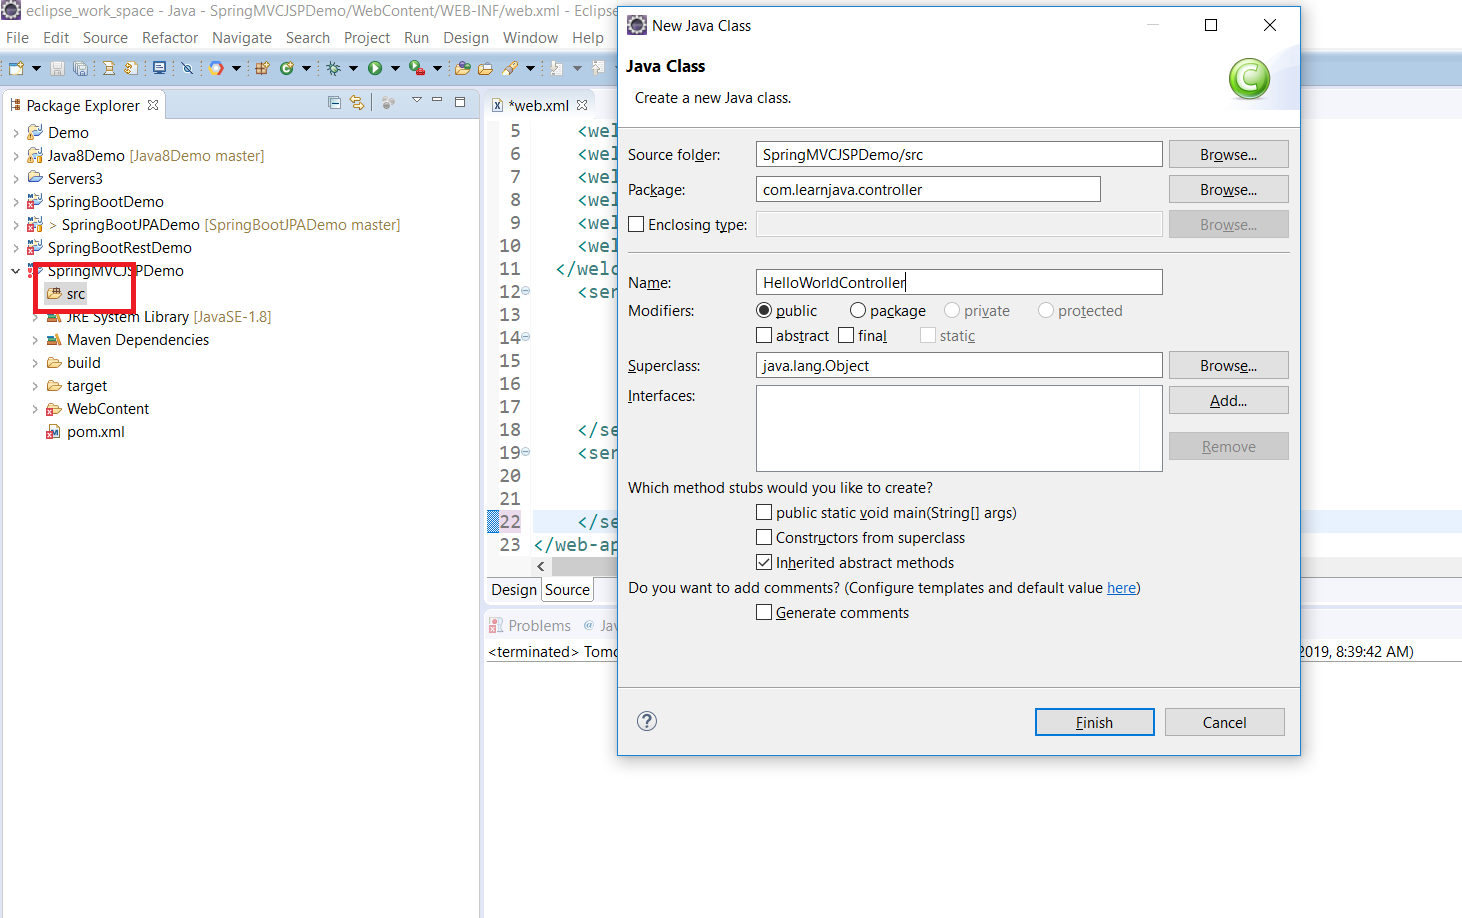
Step 2 – Add the following code:
package com.learnjava.controller;

import org.springframework.stereotype.Controller;
import org.springframework.web.bind.annotation.RequestMapping;
import org.springframework.web.servlet.ModelAndView;

@Controller
public class HelloWorldController {

  @RequestMapping("/hello")
  public ModelAndView helloWorld() {

    System.out.println("In HelloWorldController");
    String message = "<br><div style='text-align:center;'>"
        + "<h1>Hello World</h1></div><br><br>";
    return new ModelAndView("hello", "message", message);
  }
}
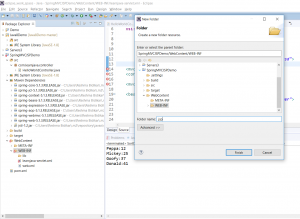
Step 3 – Create the WEB-INF/jsp folder as follows:
Step 3 – Enter folder name as “jsp”
Step 4 – Create hello.jsp
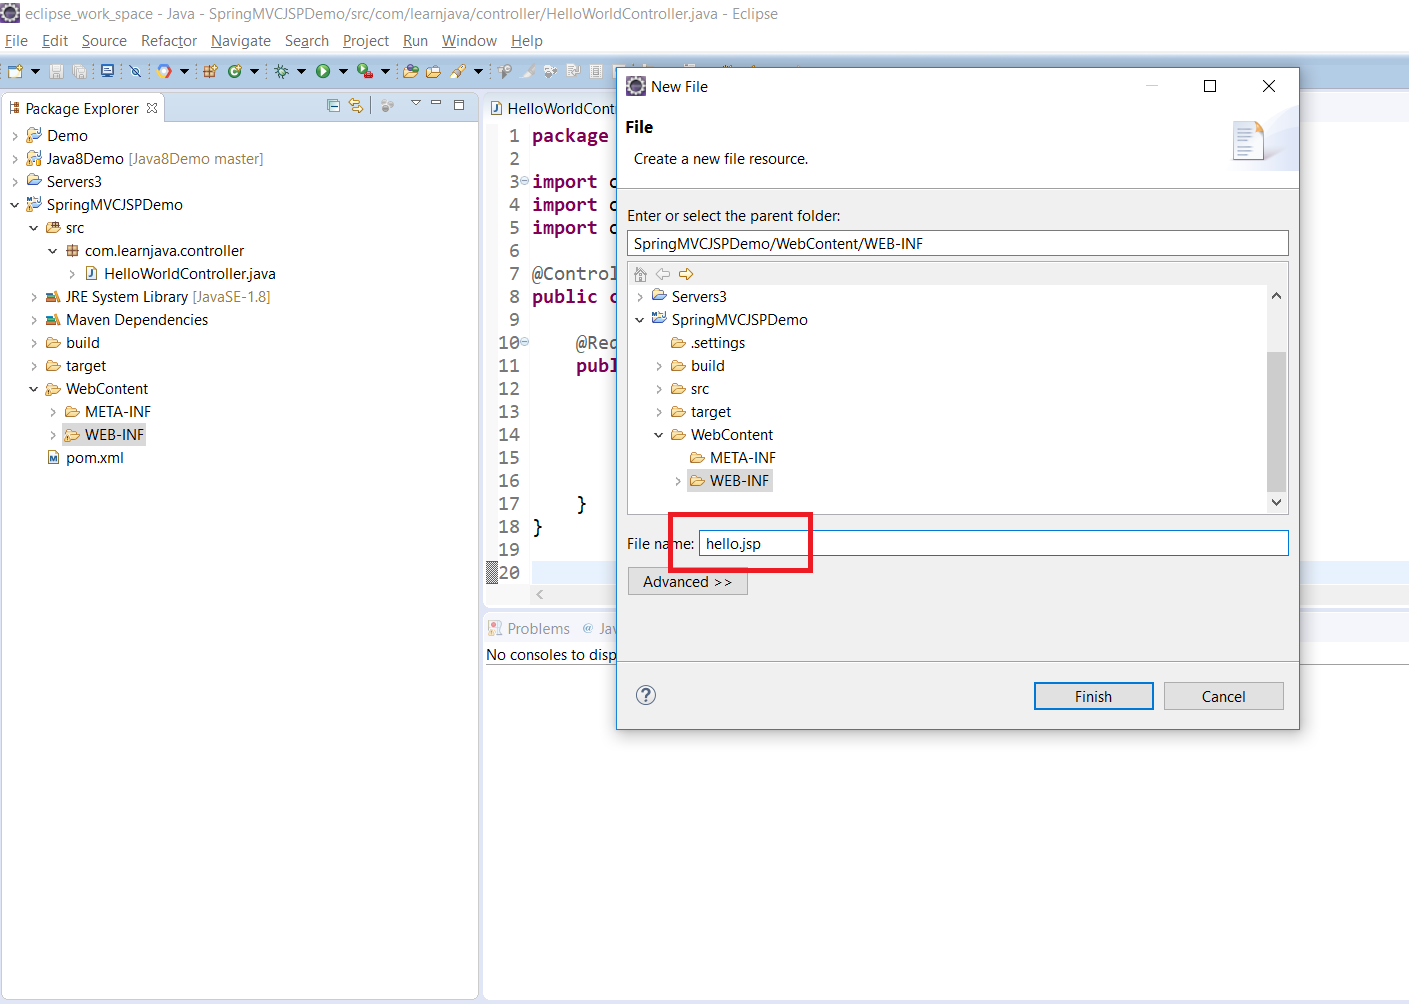
Step 5 – Add the following code:
<html>
<head>LearnJava SpringMVC Example</title>

</head>
<body>${message}

  <br>
  <br>
  <div
    style="font-family: verdana; padding: 10px; border-radius: 10px; font-size: 12px; text-align: center;">

    Visit <a href="https://learnjava.co.in">LearnJava</a> to learn more Java stuff!!.

  </div>
</body>
</html>
Compile
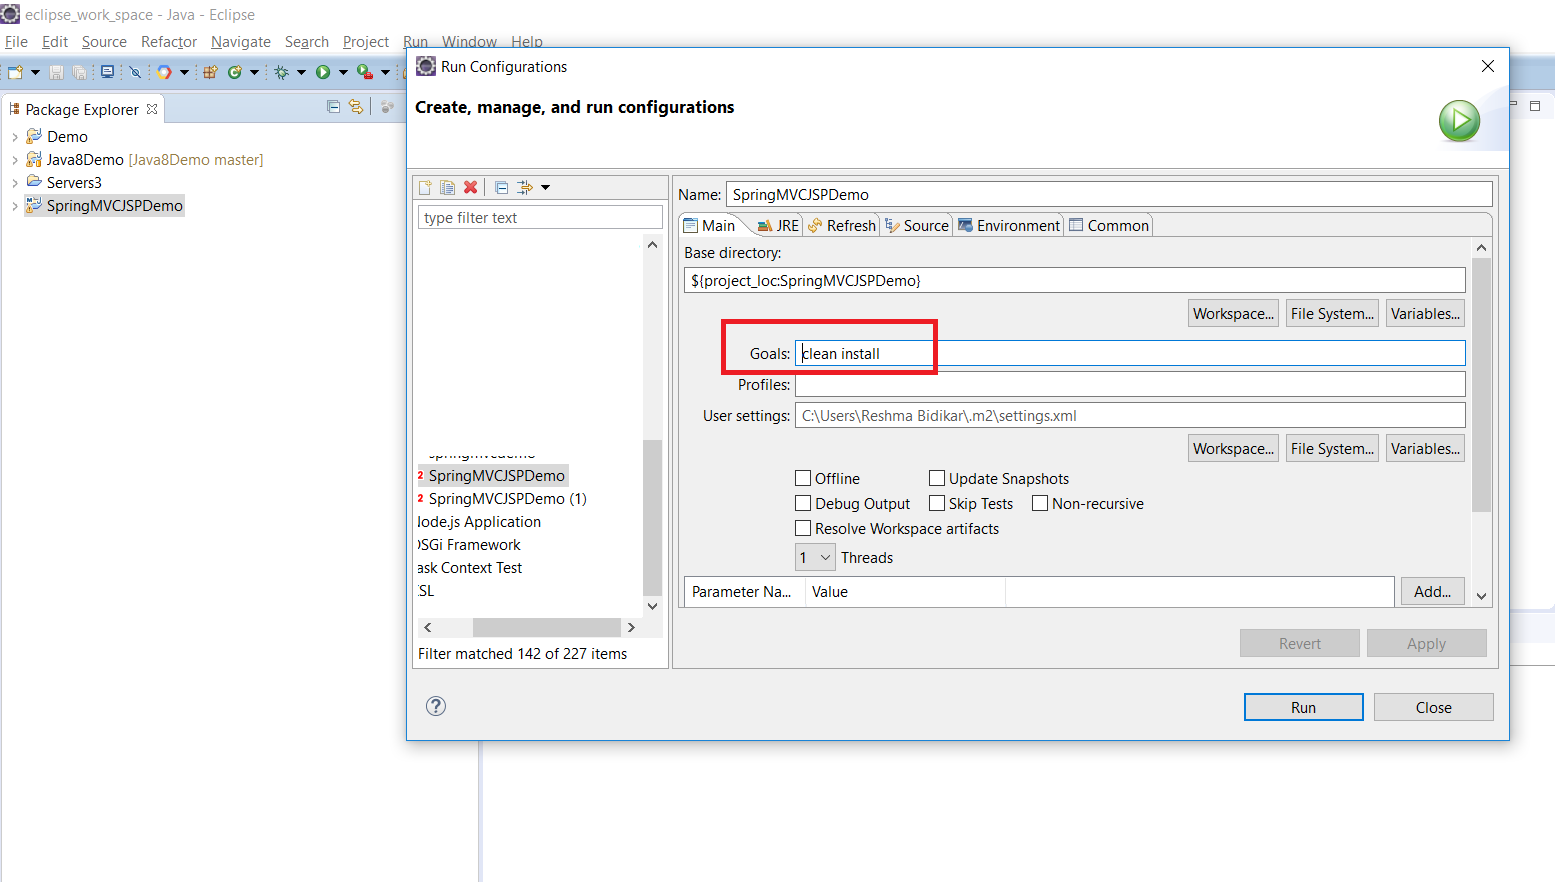
Step 1 – Right Click on Project –> Run As –> Maven Build
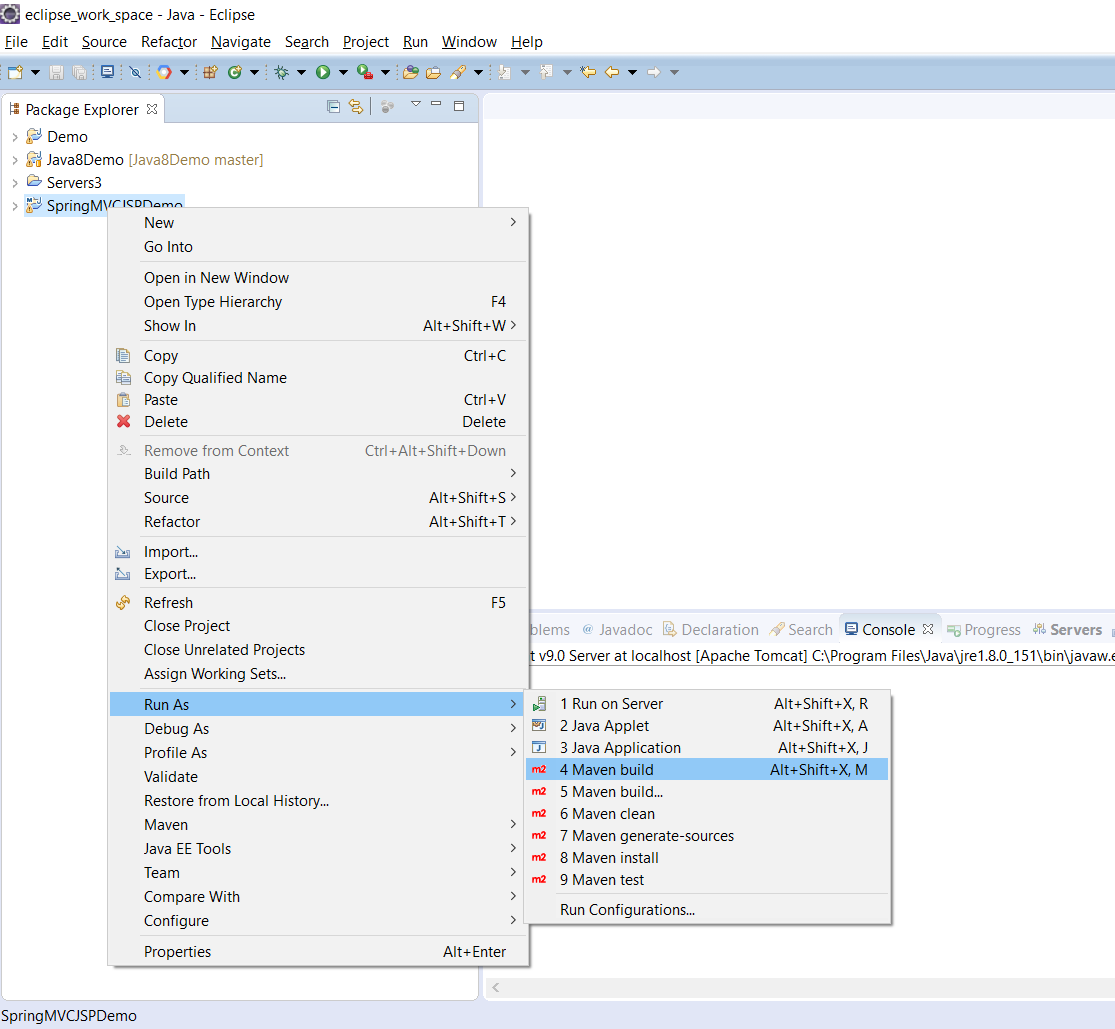
Step 2 – If prompted, enter the goals as Clean –> Install
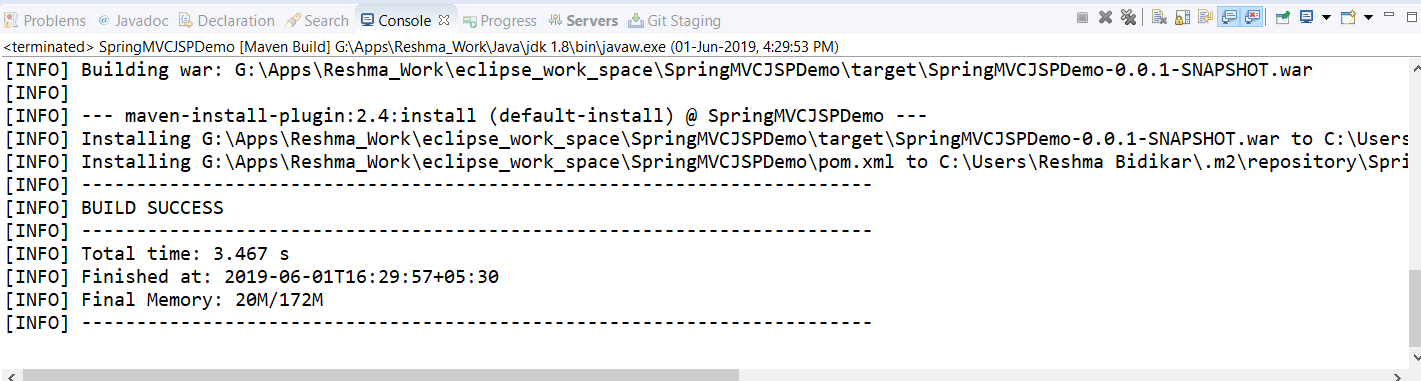
This will display a build success message as follows:
Test
You will need to have Tomcat setup in Eclipse. If you do not have Tomcat set up, refer to this blog post.
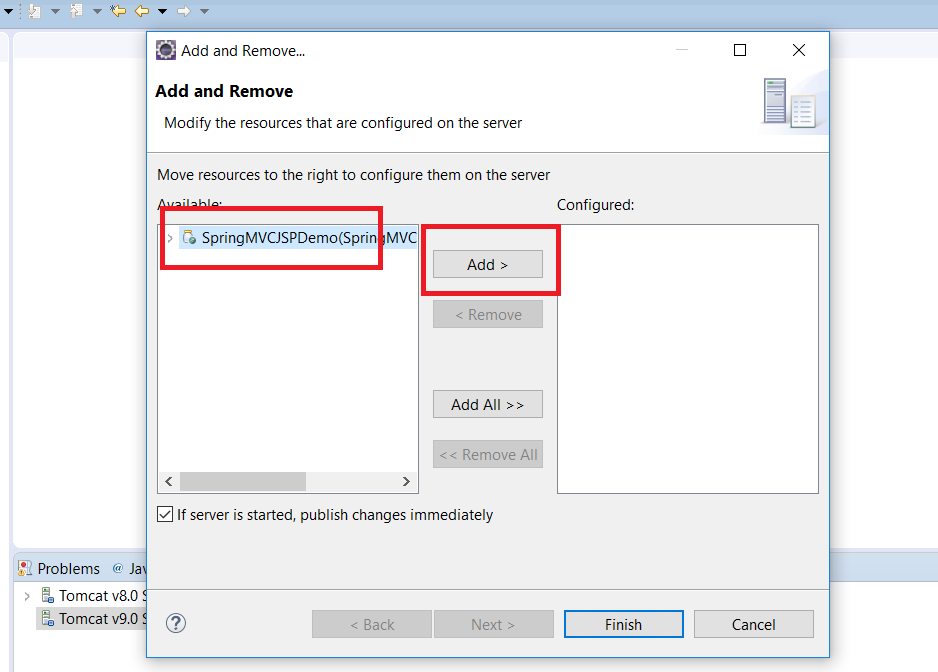
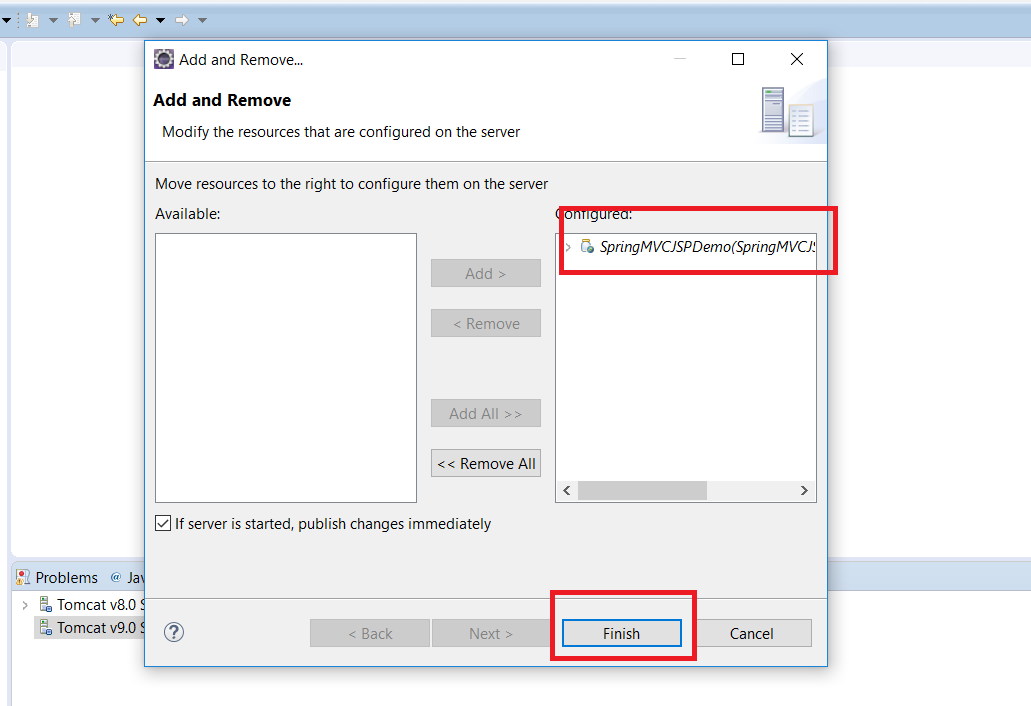
Step 1 – Right click on “Tomcat Server” at the bottom and click Add/Remove:

Step 2 – Select SpringMVCJSPDemo project and click “Add”:
Step 3 – Click on Finish.
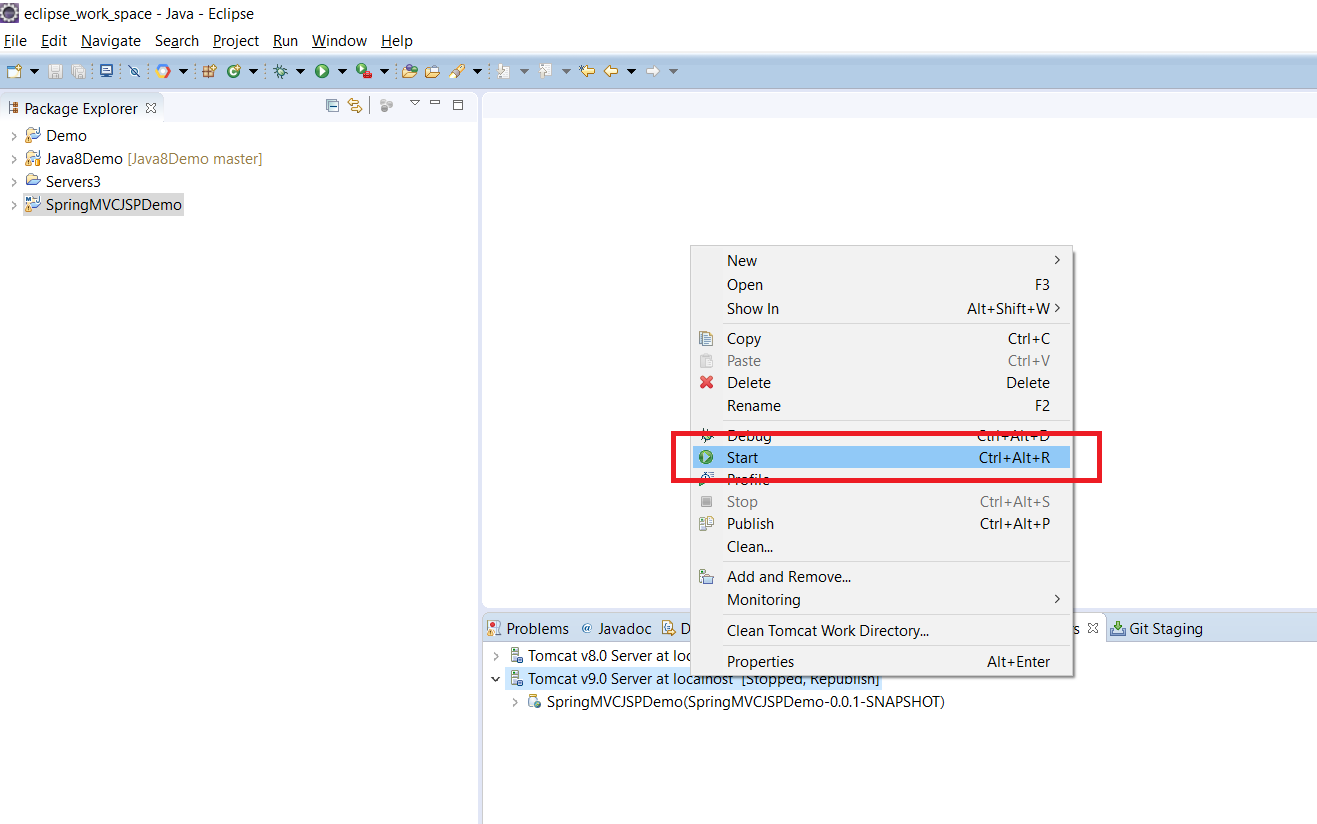
Step 4 – Right click on “Tomcat” and click on “Start”
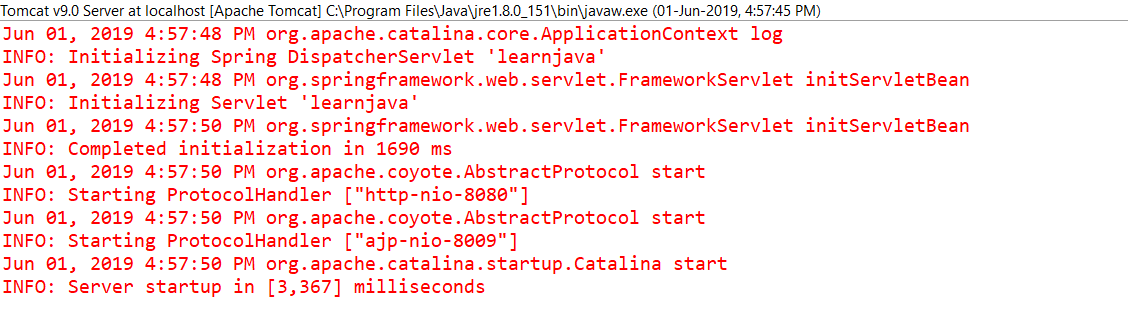
If the server starts successfully, you should see a message similar to the following in the console:
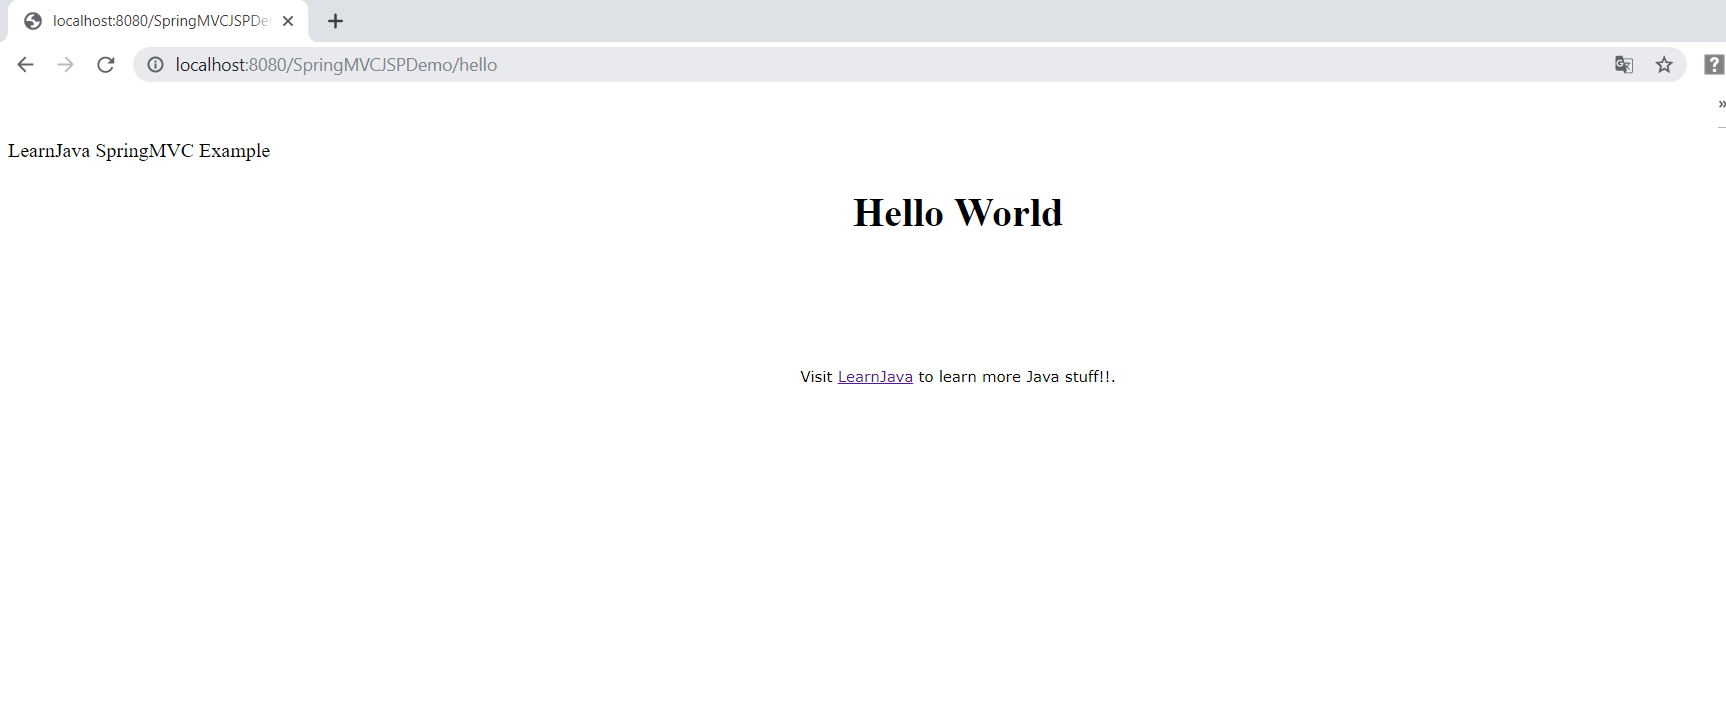
Step 5 – Open a browser and type http://localhost:8080/SpringMVCJSPDemo/hello. This will display the following:
You can download the complete source code from the Github repository here.
Further Learning
Spring MasterClass
Spring Tutorial For Beginners
Step by Step Spring MVC Tutorial
Spring Framework in Easy Steps