Creating a Hello World Spring Boot Application in Eclipse Using Maven
 Posted On
In this blog post, I will be explaining how you can create a Hello World Spring Boot application in Eclipse using Maven.
What is Spring Boot?
Spring boot sits on top of Spring. It automatically does the configuration of the application for you by assuming some defaults. These defaults are sufficient to get you started most of the times but you easily change these default values if required. This allows you to have a spring application up and running very quickly without having to bother with boiler plate stuff. All you have to do is tell Spring boot the type of application you are building. It provides Embedded HTTP servers like Tomcat, Jetty etc. which makes it easy to develop web applications. In order to know more about Spring Boot, you can refer to this blog post.
Creating Hello World Spring Boot Application
Let us now learn how to create a basic Hello World Spring Boot application in Eclipse using Maven
Project Creating and setup
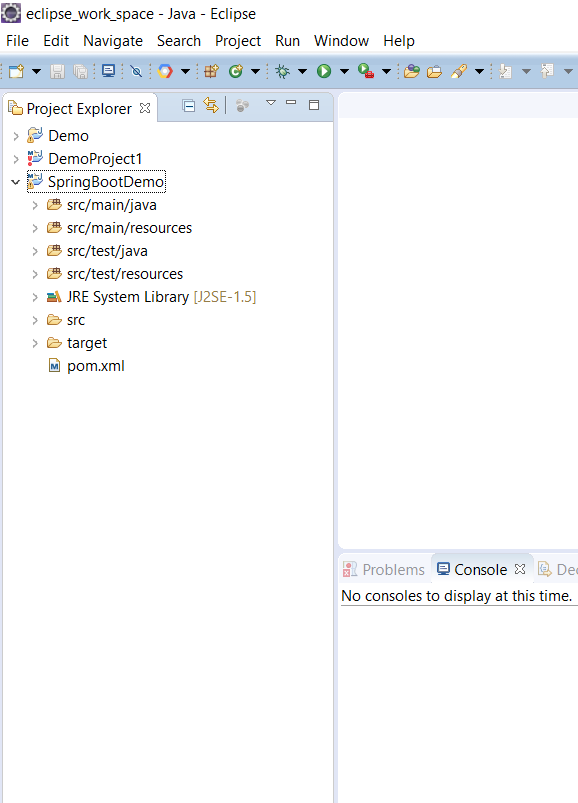
Step 1 – Create a new Maven Project (Refer to this blog post). Your project should look as follows:
Step 2 – Add the Spring Boot dependencies to the POM file. Your POM file should look similar to the following:
<project xmlns="http://maven.apache.org/POM/4.0.0" xmlns:xsi="http://www.w3.org/2001/XMLSchema-instance" xsi:schemaLocation="http://maven.apache.org/POM/4.0.0 http://maven.apache.org/xsd/maven-4.0.0.xsd">
  <modelVersion>4.0.0</modelVersion>
  <groupId>com.learnjava</groupId>
  <artifactId>SpringBootDemo</artifactId>
  <version>0.0.1-SNAPSHOT</version>

  	<parent>
    <groupId>org.springframework.boot</groupId>
    <artifactId>spring-boot-starter-parent</artifactId>
    <version>2.1.2.RELEASE</version>
  </parent>
  <dependencies>
  <dependency>
    <groupId>org.springframework.boot</groupId>
    <artifactId>spring-boot-starter-web</artifactId>
  </dependency>
  </dependencies>
</project>
Spring Boot provides a number of ‘starters’ that add the necessary jar files to the classpath. Here we are using the following starters:
- spring-boot-starter-parent – This provides useful Maven defaults.
- spring-boot-starter-web – This tells Spring Boot that we are developing a web application.
In order to know more about Spring Boot starters, you can refer to this blog post.
Writing Code
Step 3 – Create Main.java in demo package as follows:
package demo;

import org.springframework.boot.SpringApplication;
import org.springframework.boot.autoconfigure.EnableAutoConfiguration;
import org.springframework.boot.autoconfigure.SpringBootApplication;
import org.springframework.web.bind.annotation.RequestMapping;
import org.springframework.web.bind.annotation.RestController;

@SpringBootApplication
public class Main {

  public static void main(String[] args) {
    SpringApplication.run(Main.class, args);
  }
}
- The Main class has the @SpringBootApplication annotation.
- It simply invokes the SpringApplication.run method. This starts the Spring application as a standalone application, runs the embedded servers and loads the beans.
Step 4 – Create HelloWorldController in demo.controller package as follows:
package demo.controller;

import org.springframework.web.bind.annotation.RequestMapping;
import org.springframework.web.bind.annotation.RestController;

@RestController
public class HelloWorldController {

  @RequestMapping("/")
  String home() {
    return "Hello World!";
  }
}
- The HelloWorldController class has the @RestController annotation. This designates the class as a REST controller, i.e. a controller that handles REST requests.
- It has a home method with the @RequestMapping annotation. This specifies that the hello method maps to the /hello path. It simply returns the String “Hello World!”
Running the application
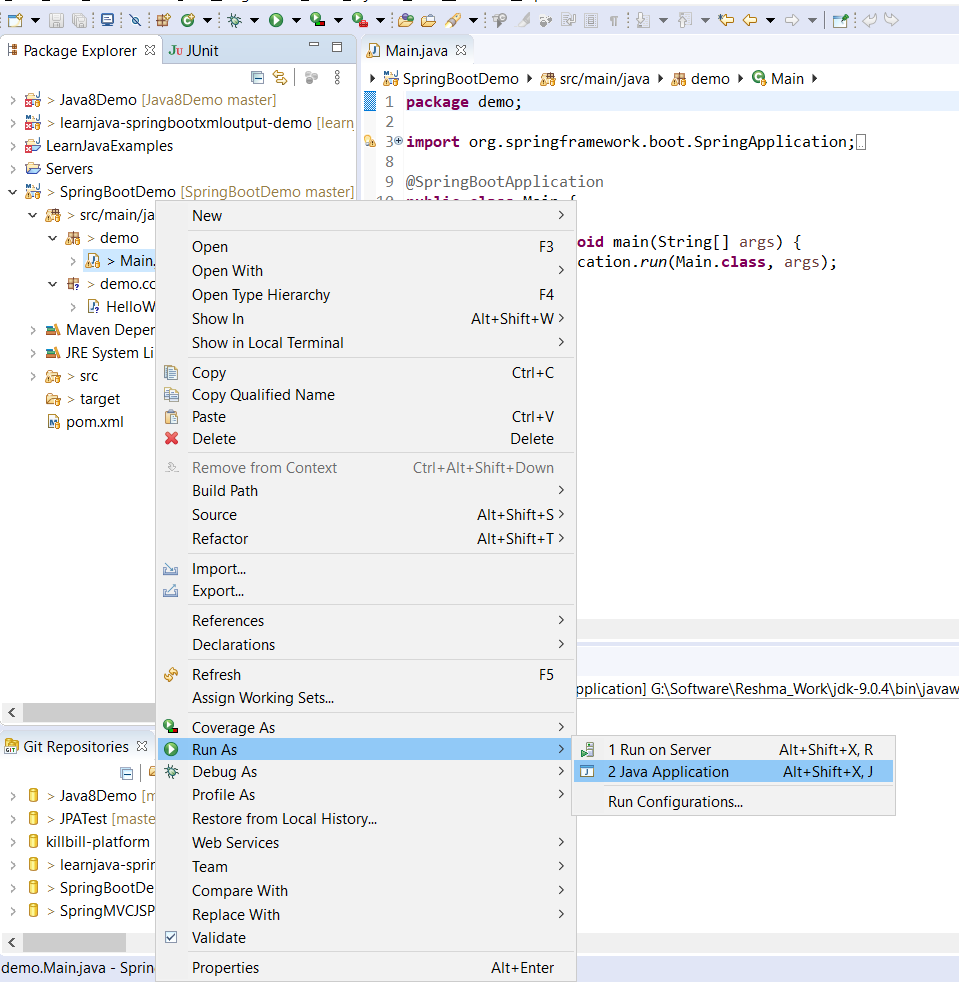
Step 5 – Run Main.java as a Java application as shown below:
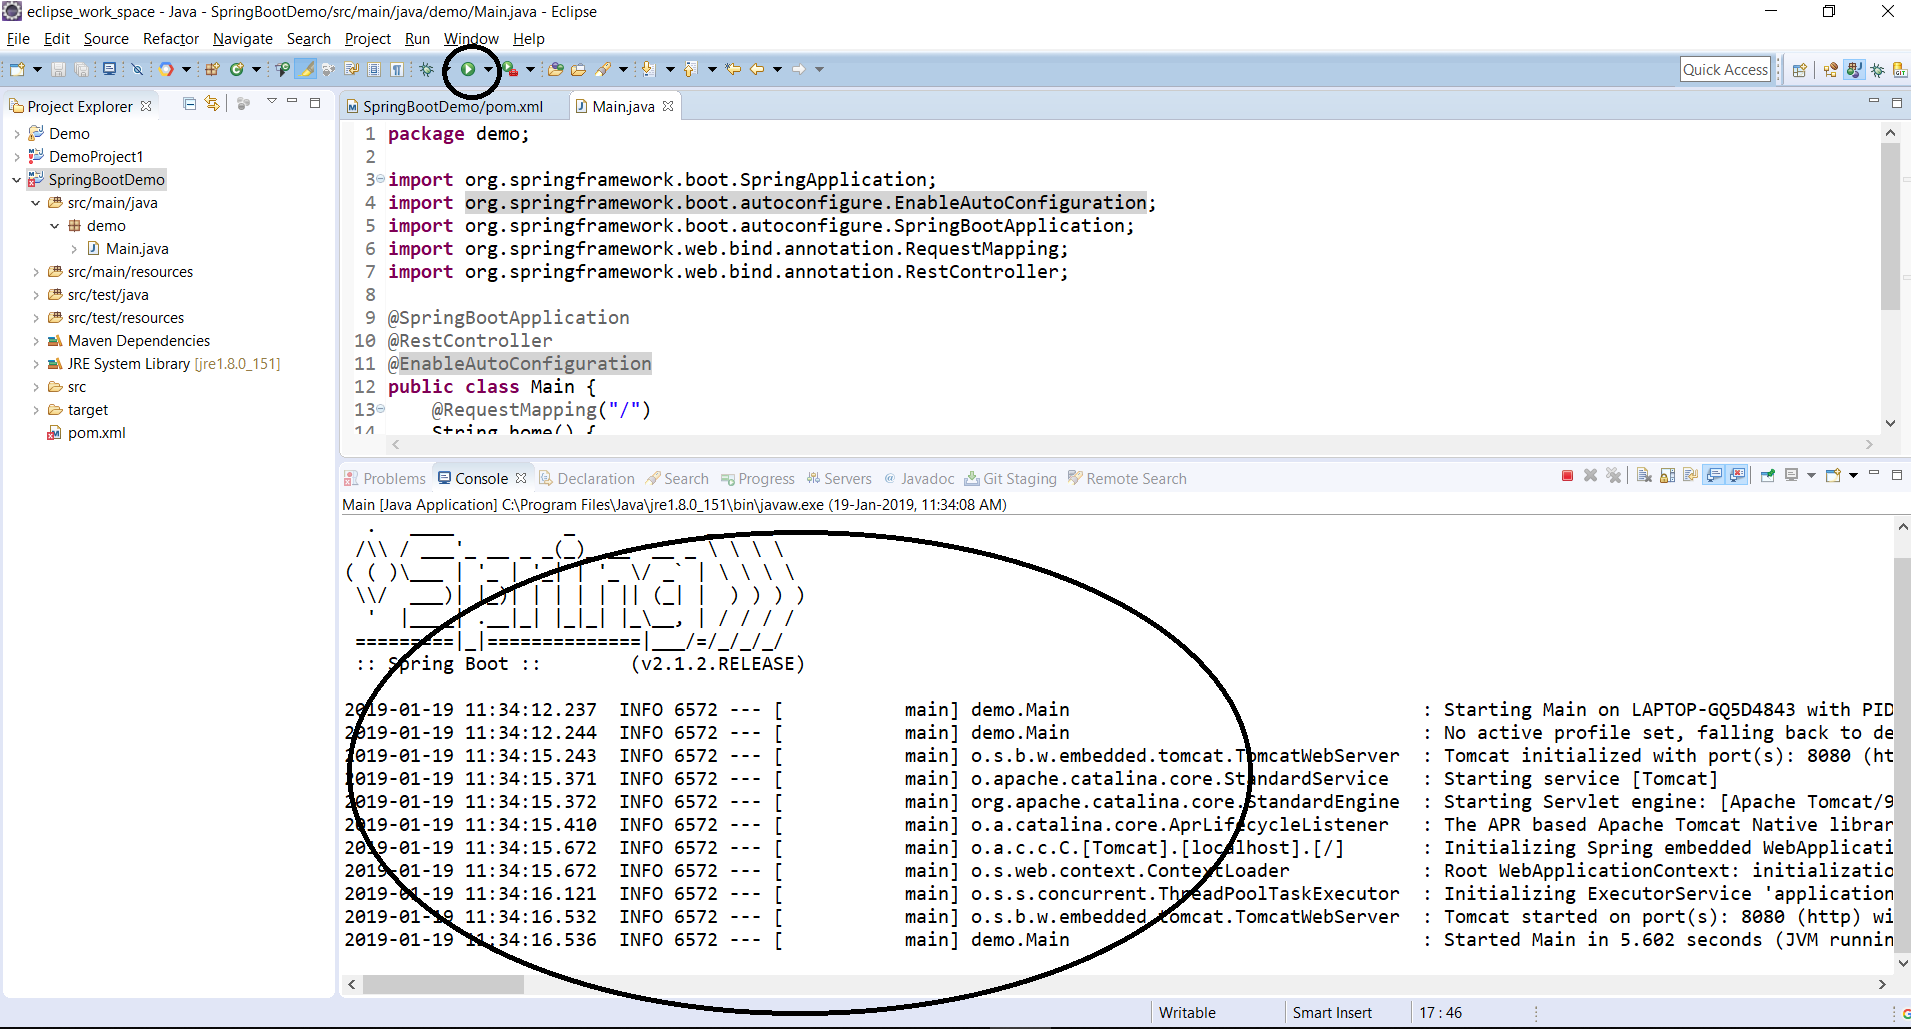
This should display the console output as highlighted below:
Step 6 – Check in the browser. Open a browser window and type http://localhost:8080/hello

So you have your Spring Boot application up and running!
You can download the source code for this project from the GitHub repository here.