Spring Initializr Explained
The Spring Initializr is a web-based service that can help you get started with Spring Boot easily. In this article, I will be explaining what Spring Initializr is and how you can you it.
Table Of Contents
What is Spring Initializr?
The Spring Initializr is a web-based service provided by the makes of Spring. You can access it from https://start.spring.io/.
This helps you create a ready to use project structure for a basic Spring Boot application. You can directly use this project structure and add your code.
How to use Spring Initializr?
First, you need to select the appropriate values and create the project structure. Next, you need to use the project structure in your IDE.
Creating Project Structure
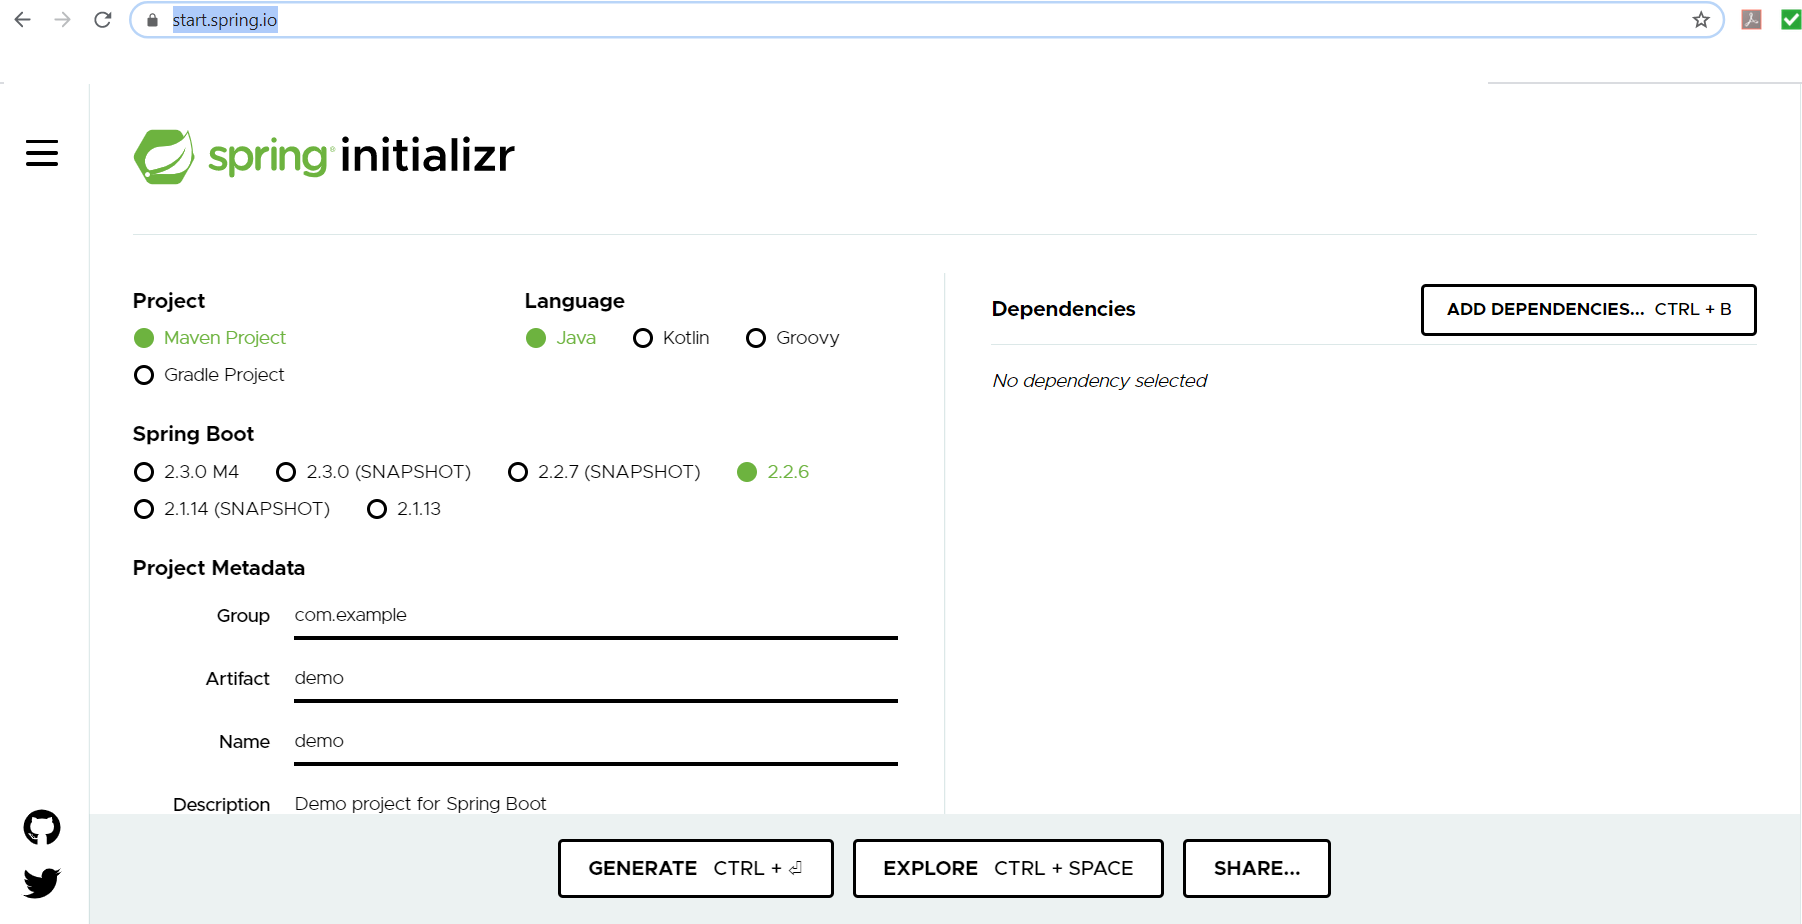
Step 1 – Go to https://start.spring.io/. You will see a screen as follows:
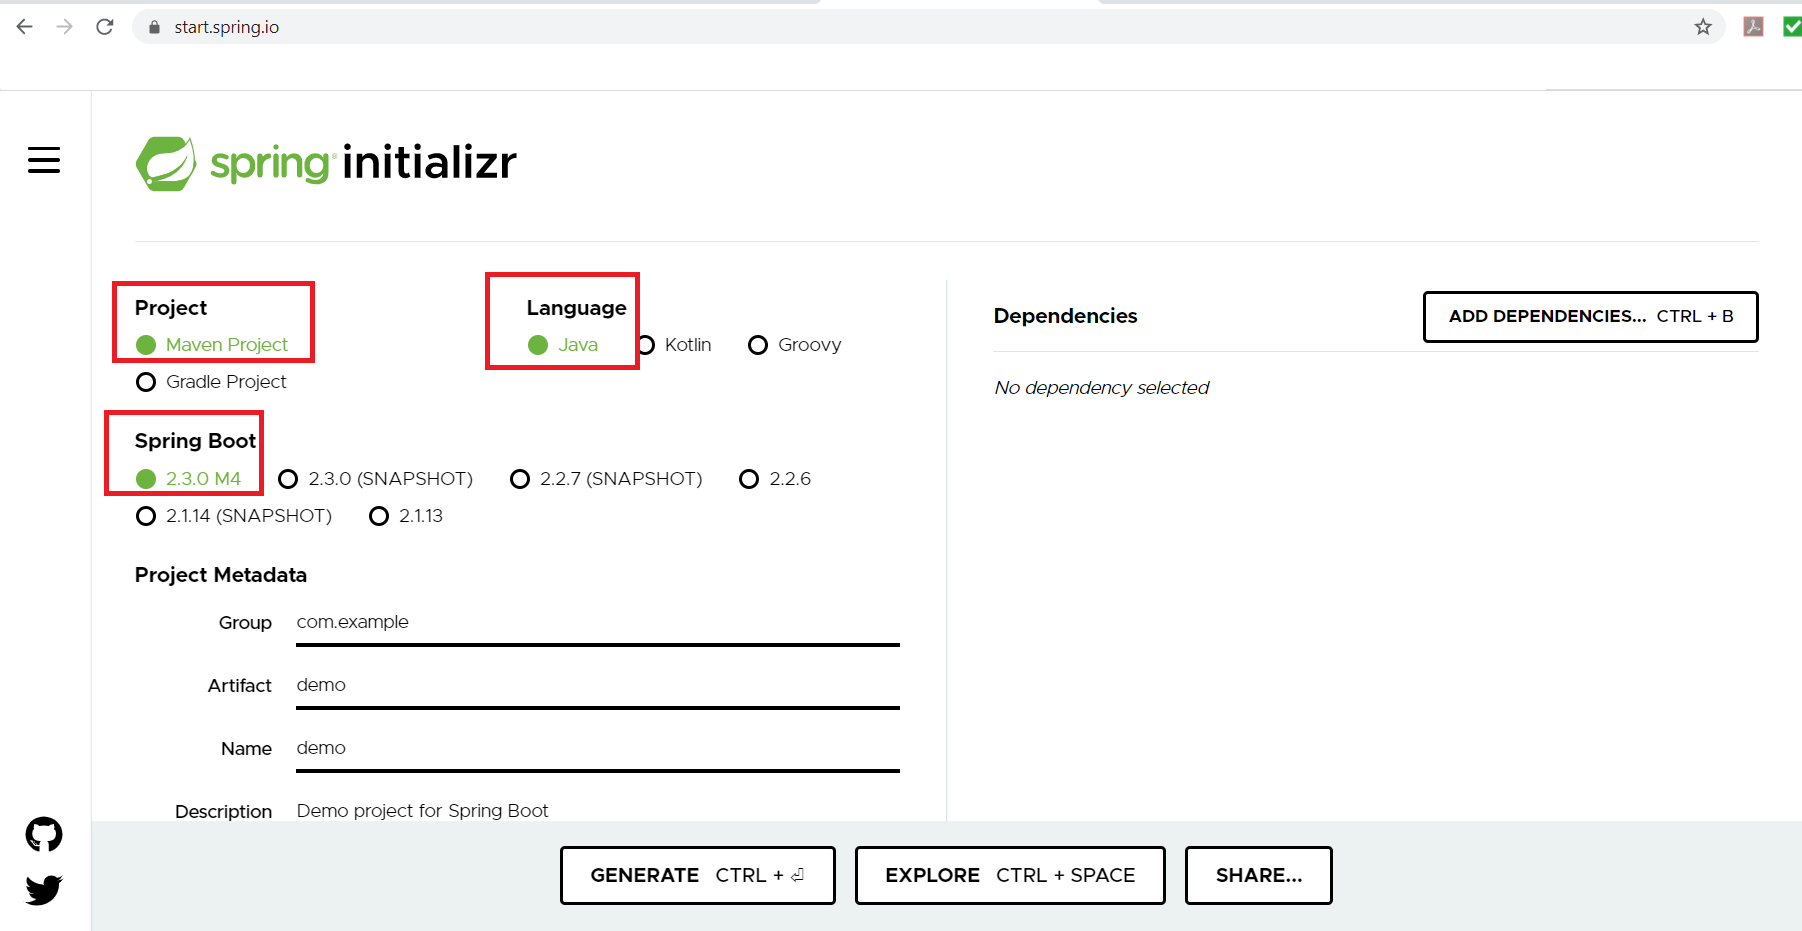
Step 2 – Select values for the type of project, programming language and Spring Boot version. Here, I will be creating a Maven Project in Java with 2.3.0 version of Spring Boot. So I will select the following:
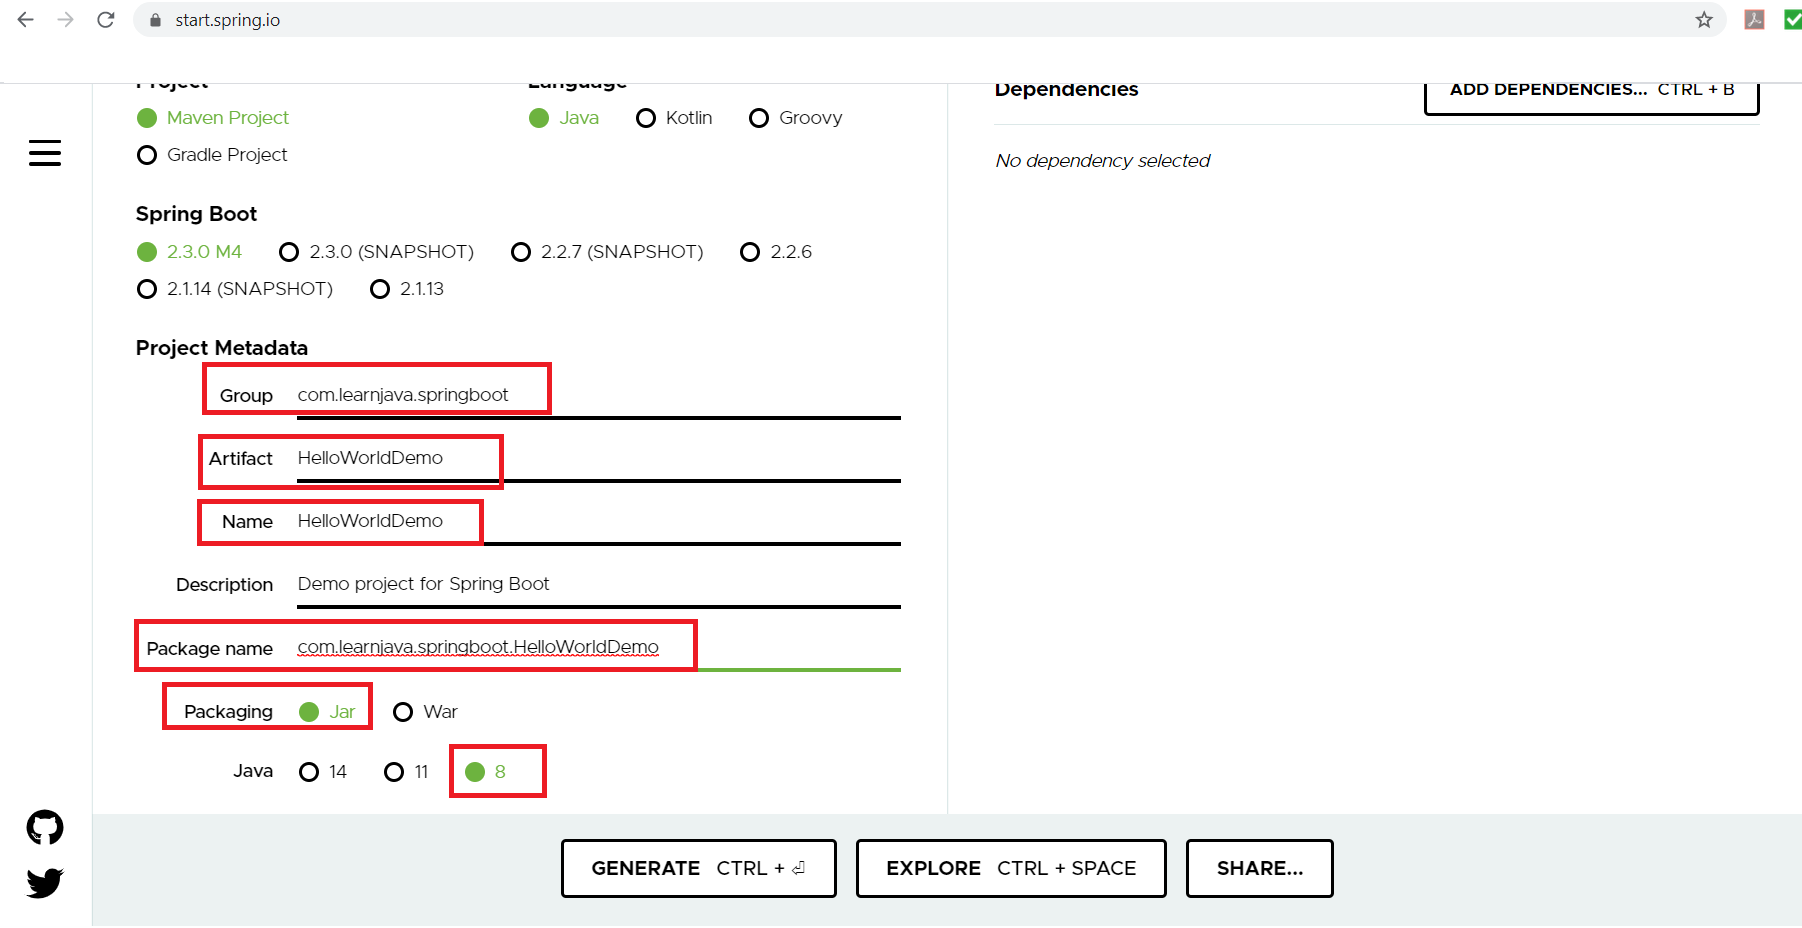
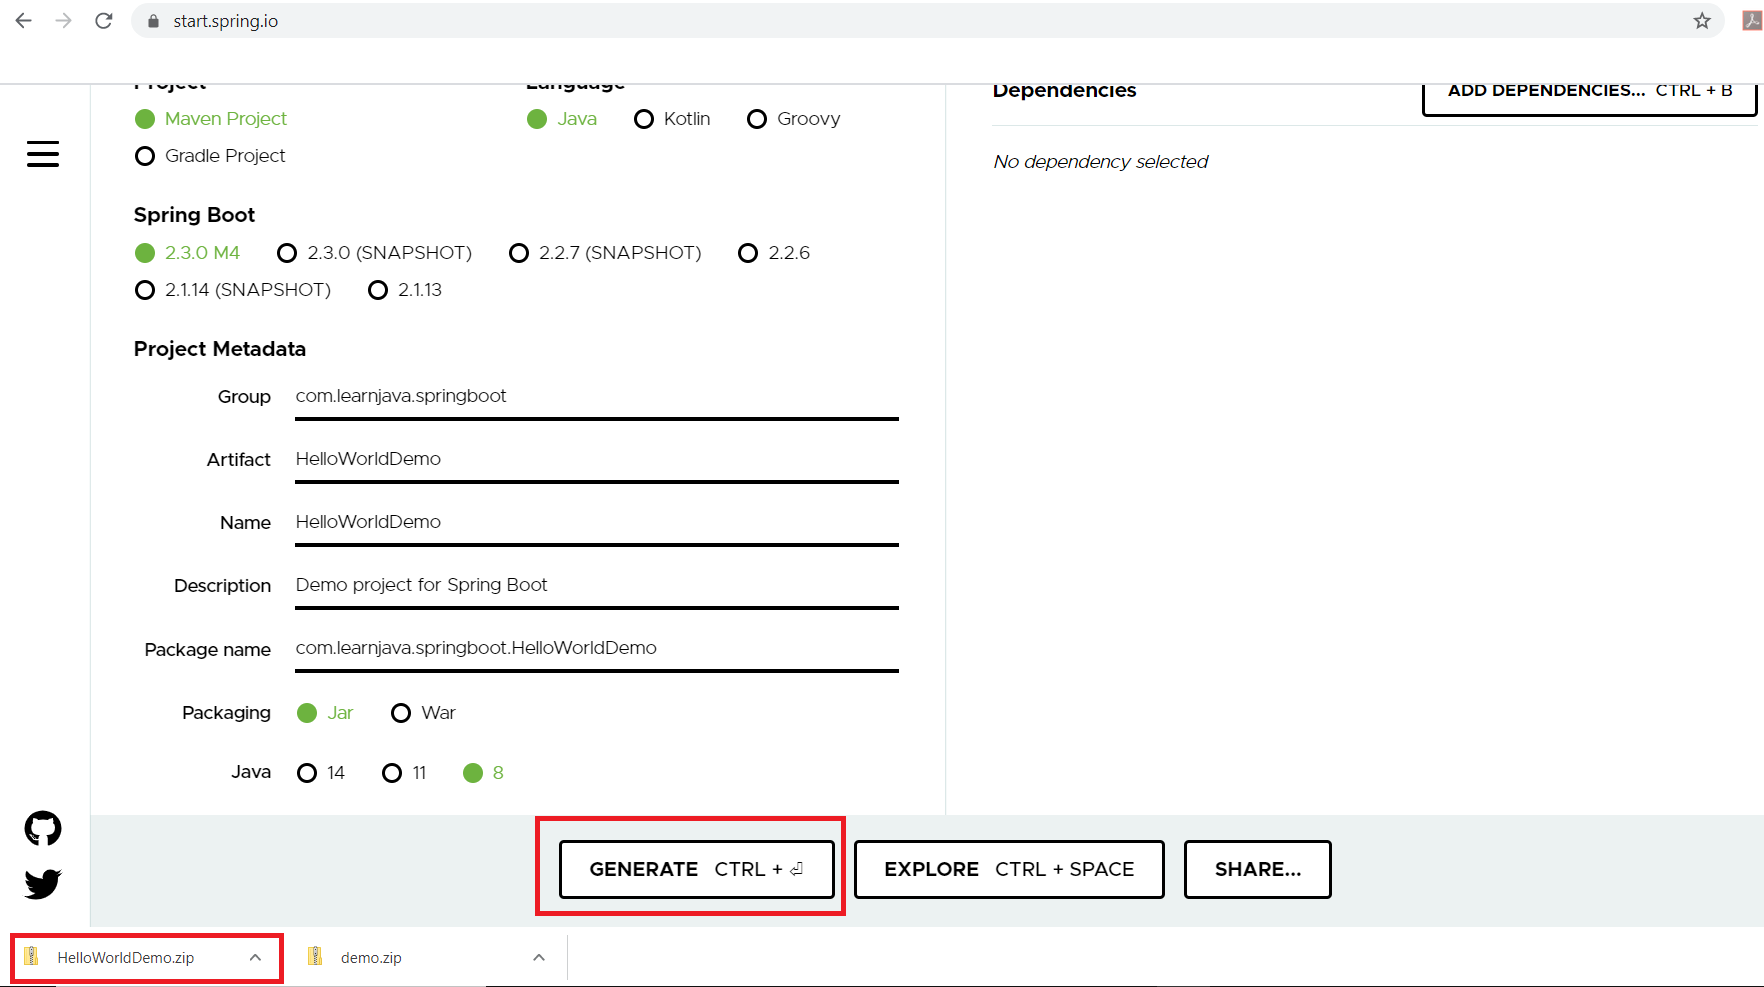
Step 3 – Customize the project metadata. So I’ve set the values as follows: I’ve also selected “Java 8” as the Java version:
Step 4 – You can also add some dependencies if you want as follows.
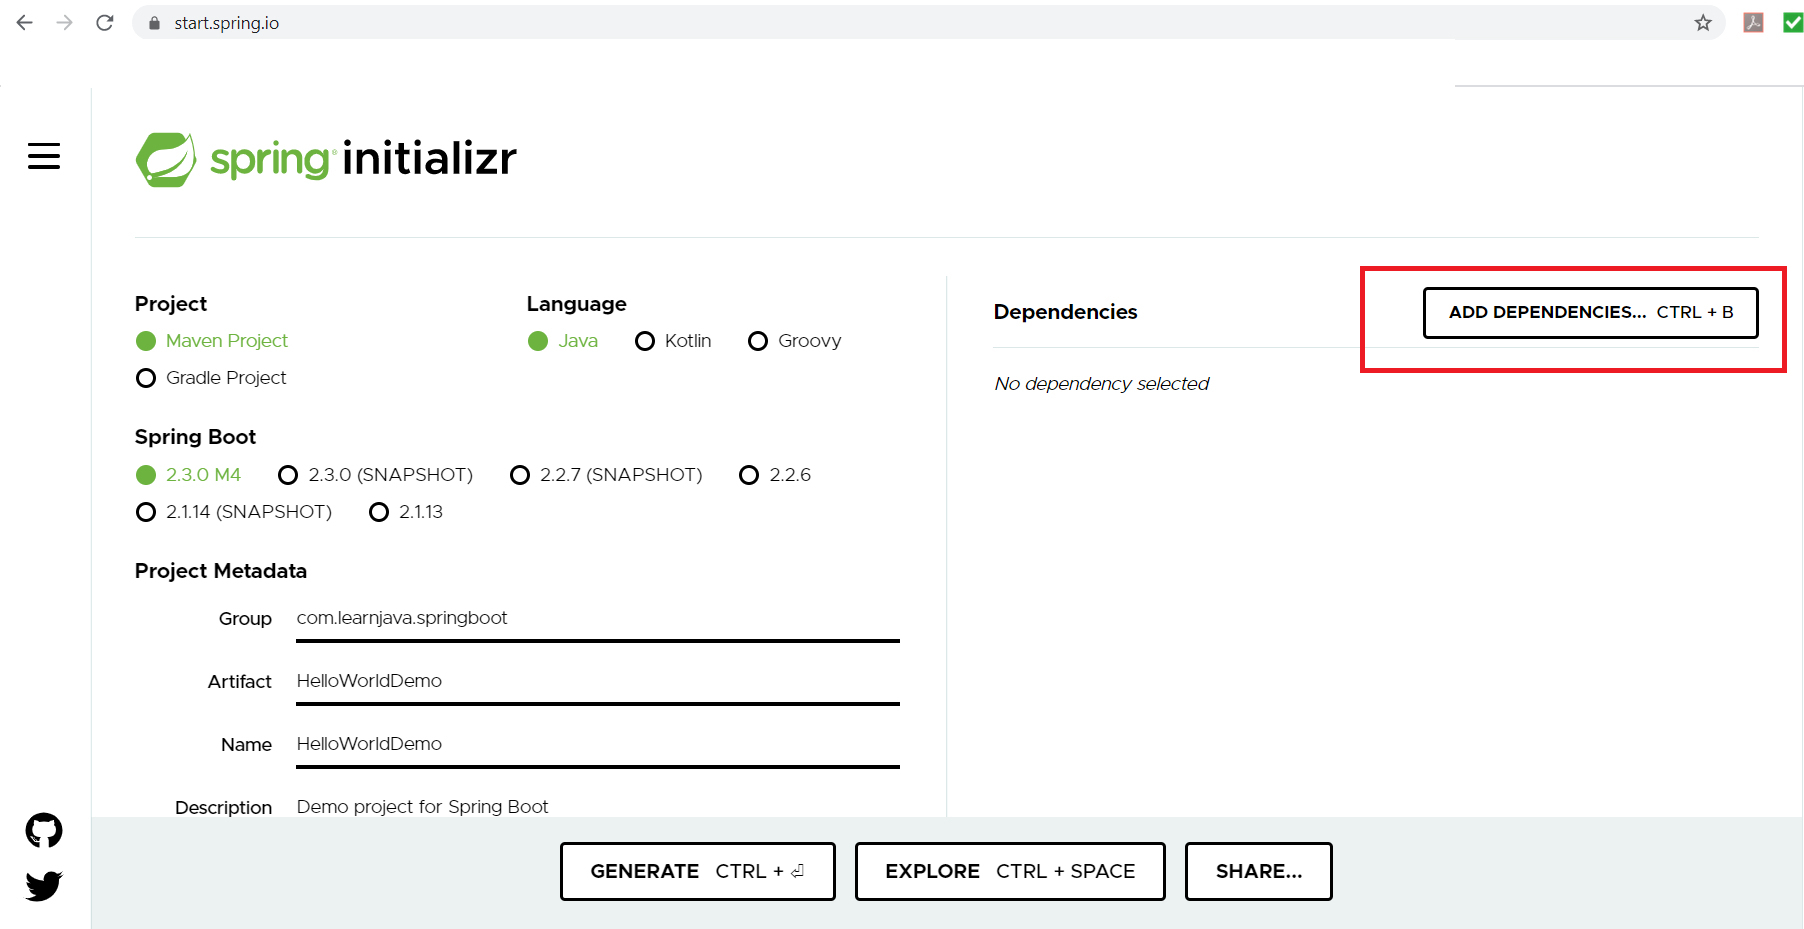
Step 4a – Click the add dependencies button as follows:
Step 4b – This displays the following screen. Here you can click on the necessary dependencies:
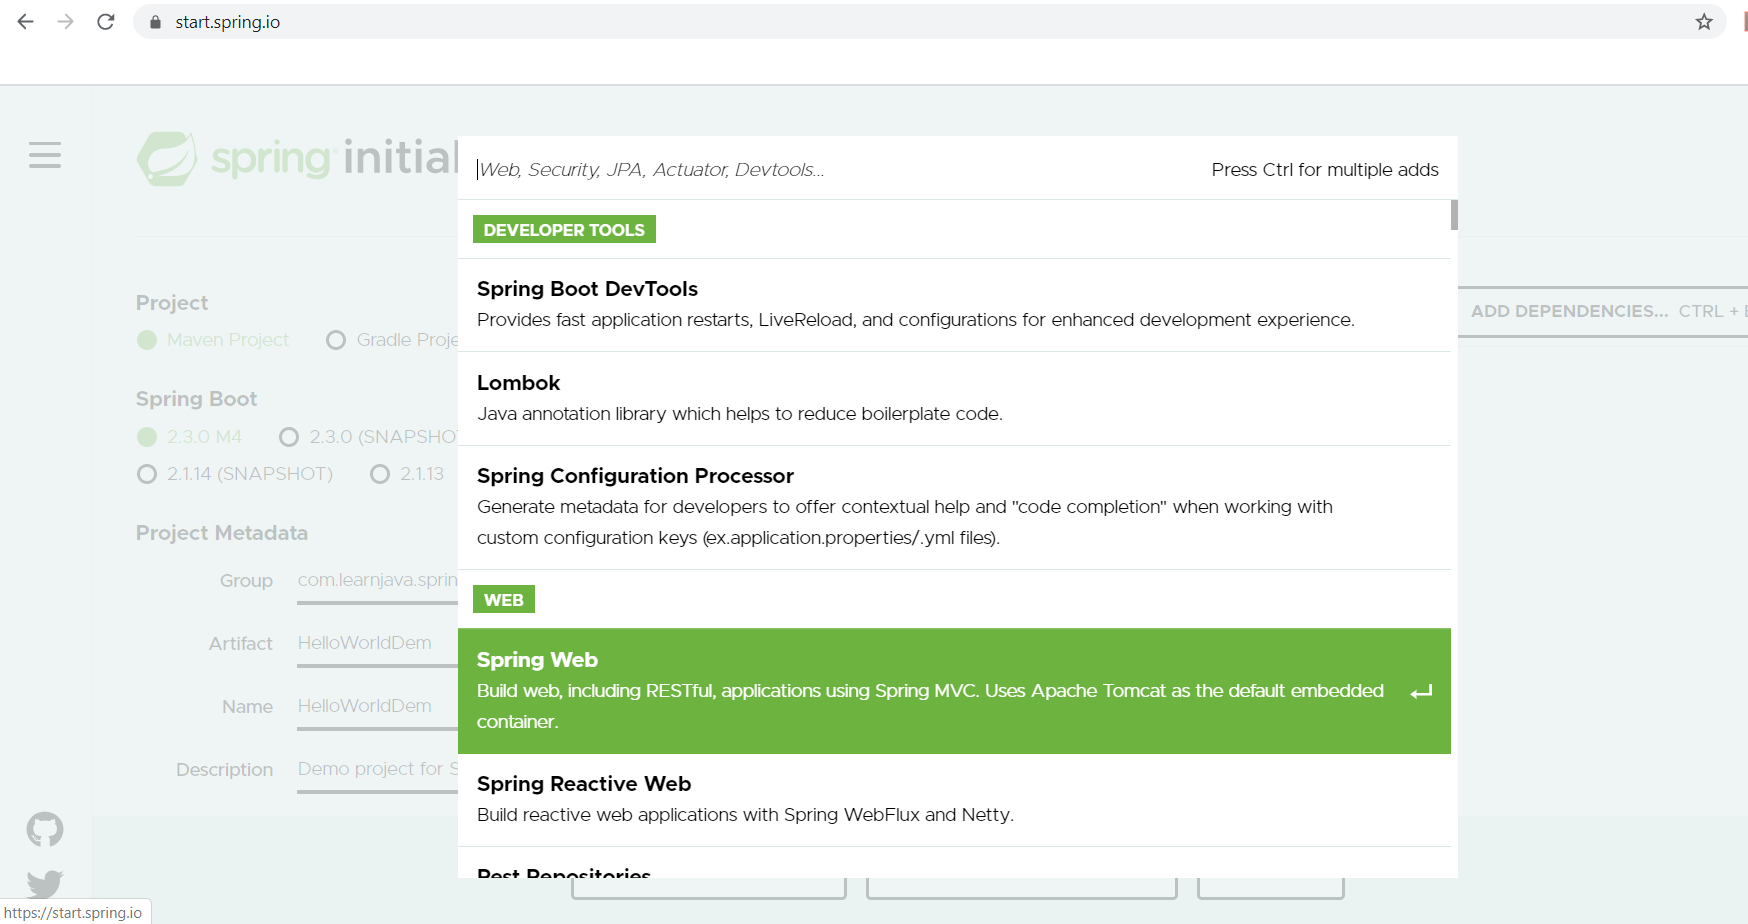
Step 4c – Once you click on the dependency, it will show the following screen. So here, I’ve selected the “Spring-web” dependency:

Step 5 – Finally, click the “Generate” button. This will download the project structure for you:
Using the Project Structure
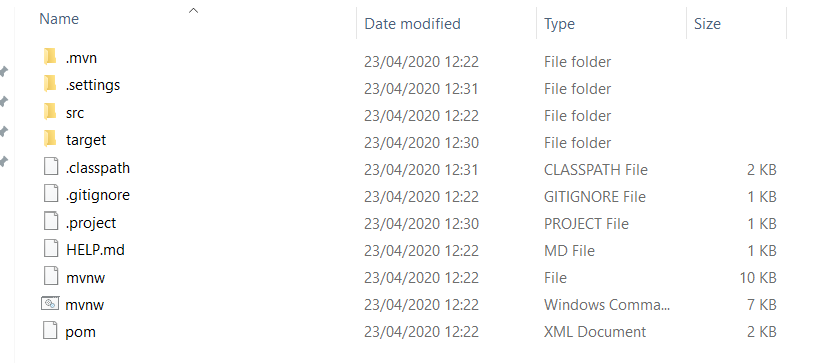
Step 1 – Unzip the downloaded file into any folder. It will display the following project structure:
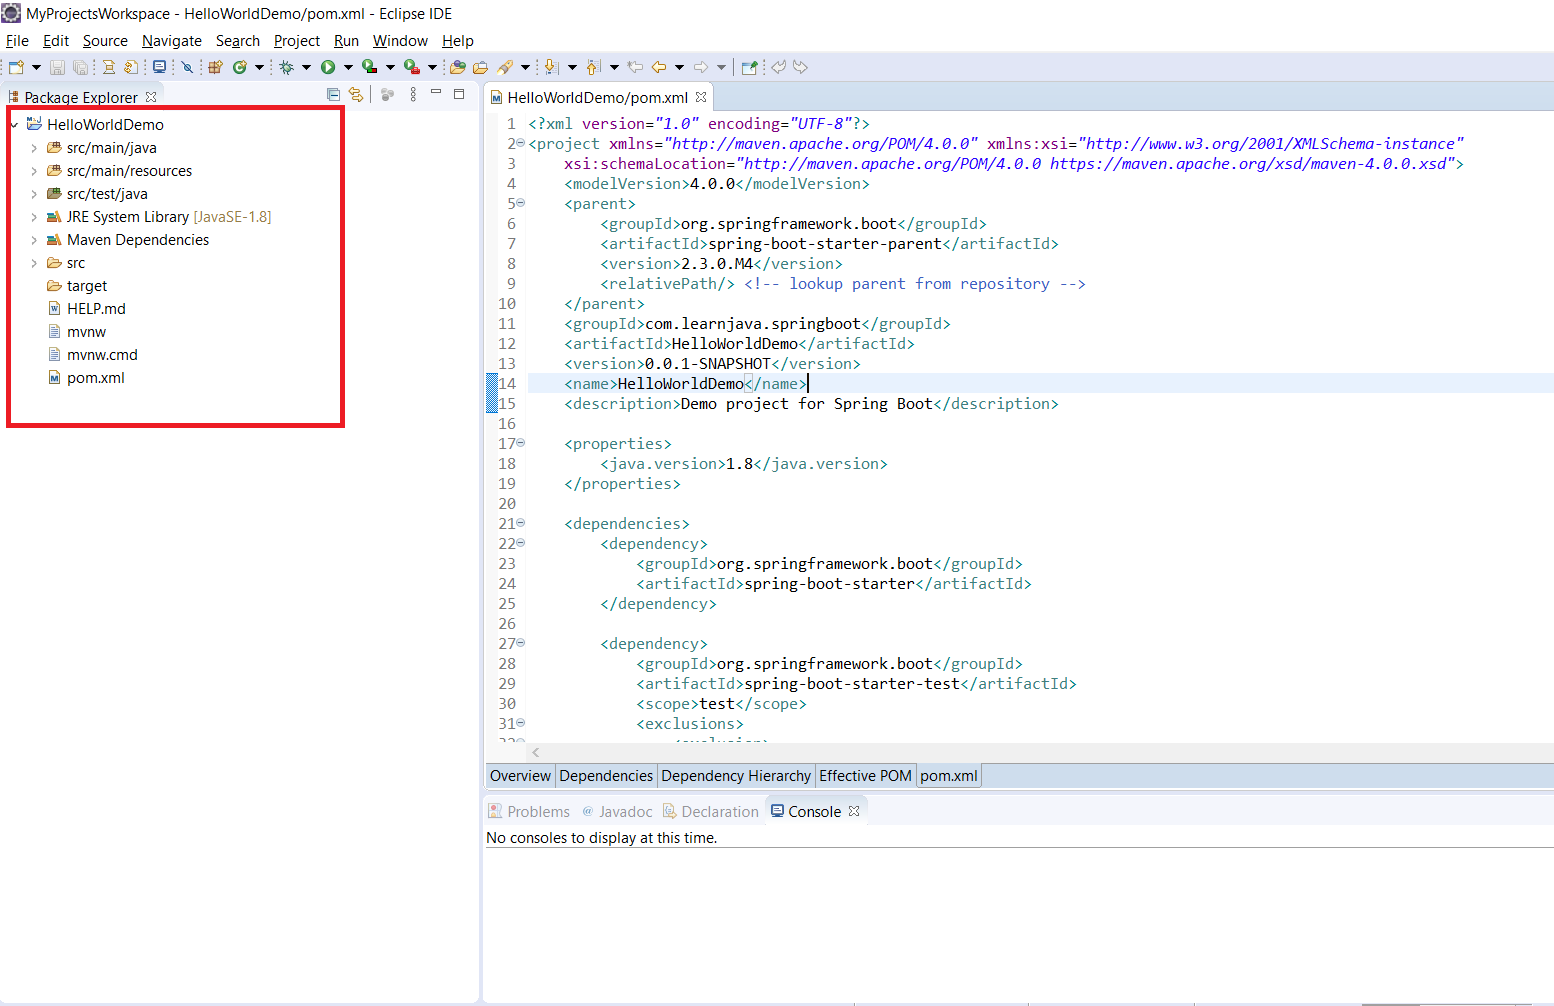
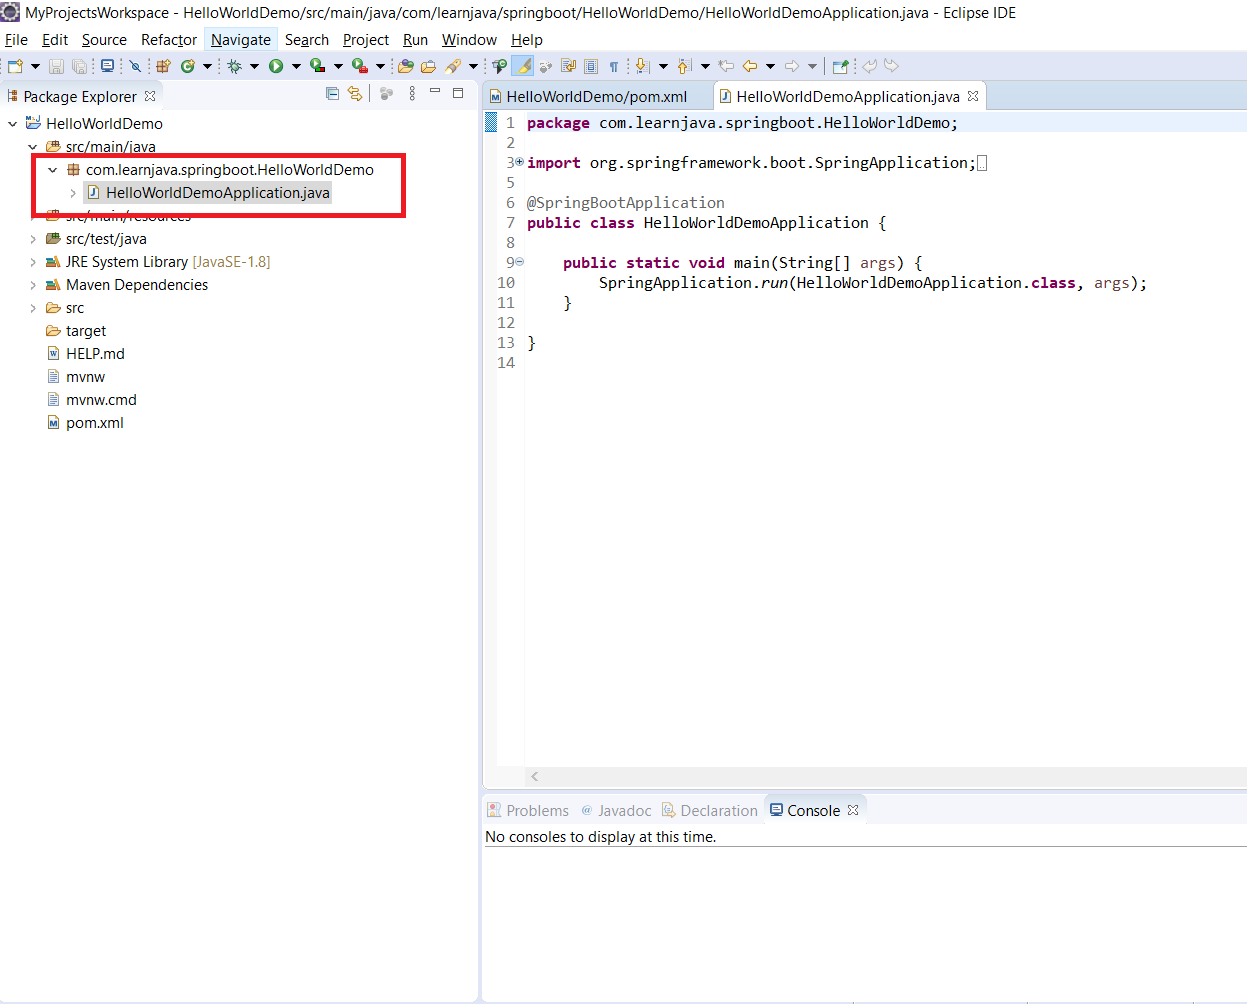
Step 2 – Import this as a Maven project in your IDE. I am using Eclipse. So this creates an Eclipse project as follows. The pom file has some default dependencies as well as the additionally selected dependencies:
A demo application is also created for you as follows:
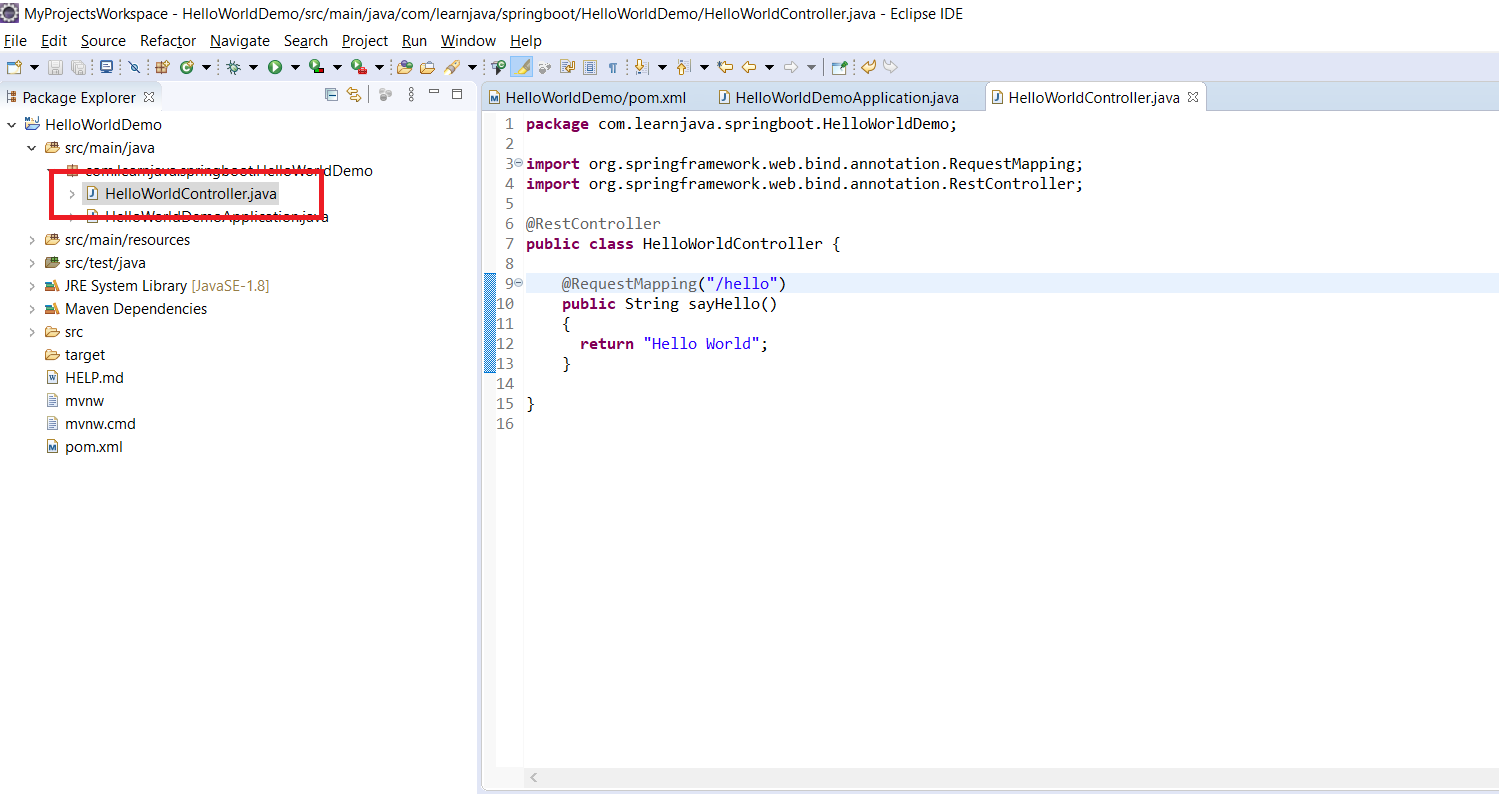
Step 3 – Add your code. Let’s add a REST controller that returns “Hello World”:
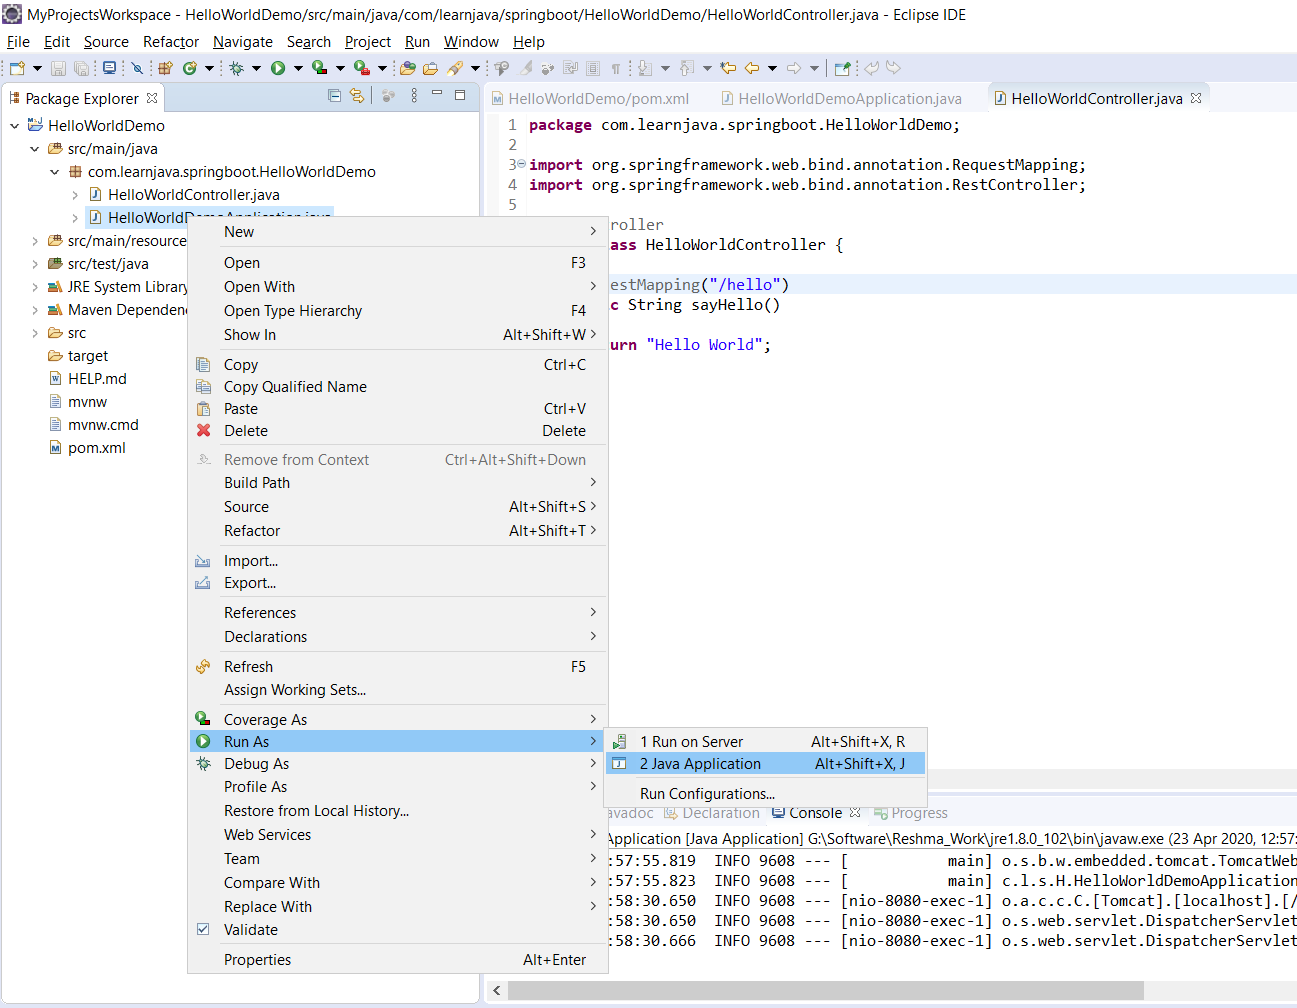
Step 4 – Run the “HelloWorldDemoApplication” as a Java application:
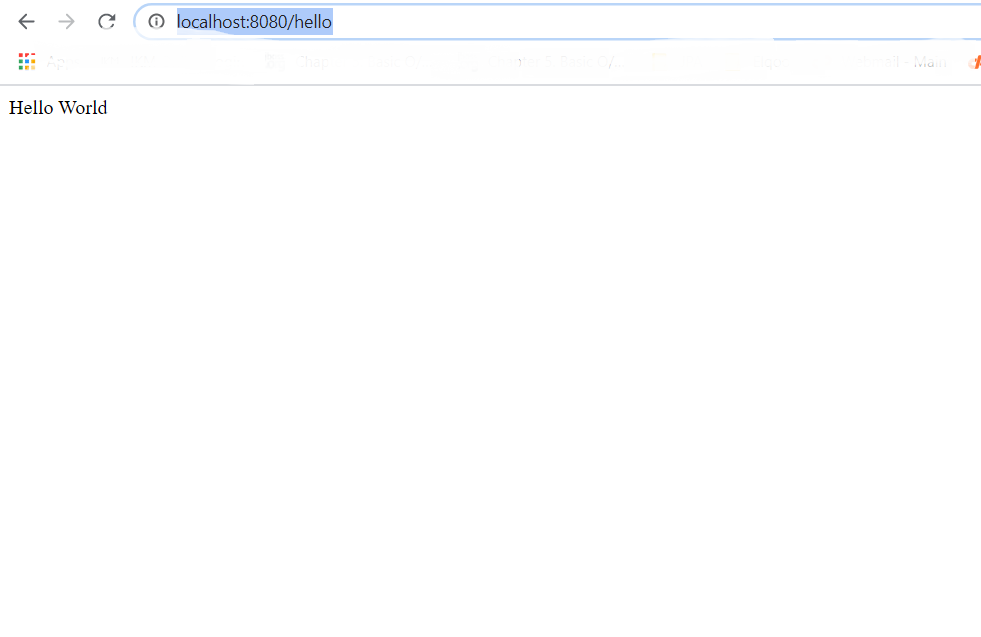
Step 5 – Open a browser window and type “http://localhost:8080/hello”. This displays the following:
Conclusion
So in this article, we saw how to use Spring Initializr. We saw how Spring Initializr creates a ready to use project structure that you can use in your application